What the game never says out loud: what every objective asks of you, where credits come from, how crystal
ore becomes energy, what powerups cost, and exactly what you keep when a mission is won, lost or flown again.
Every mission is a list of objectives. Clear them, then leave: back to open space, or onto the pickup transport.
Credits from fighting are yours the moment you earn them: 1 per point of armor you knock off, plus a bounty per kill. A mission you haven't won pays them once, at your best attempt; winning pays that run's own in full.
Ore pays only when it's delivered, and only if you win. So do extra lives bought with ore.
Lose a ship and you can respawn where you fell, within ten seconds. Lose the last one and the mission ends. Try it again whenever you like.
Anything you spend is gone at once. Anything you gain is only kept by winning.
Replaying a mission you've already won costs nothing and earns nothing.
Pick your difficulty under SETTINGS: ROOKIE (where a new save starts), PILOT or ELITE. On the easier two, Corp weapons fire, explosions, collisions and magma hurt you less, wall guns aim less tightly through mission 30, and from mission 12 missions open with fewer Corp ships and rig guns. ROOKIE also eases mining and drops more hearts. Details.
A first-time win spins the payout wheel: credits, and sometimes an extra life, a powerup, an arsenal item or an upgrade.
Every rig drifts through space and slowly turns, and your scout inherits none of that motion. Inside a
corridor the walls swing toward you, and a straight passage becomes a corner while you're in it. That's the
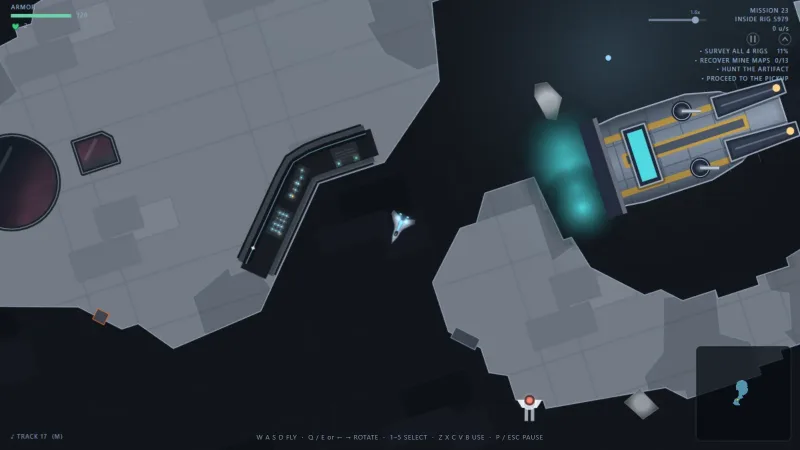
game: you are always flying a ship through a moving building.
You fly in screen directions. Push up and you go up the screen, whichever way the nose is
pointing, and a push is worth the same in every direction. The nose is for aiming.
A scrape is free; an impact isn't. Touch a wall gently and you bounce off for nothing.
Above a certain speed, damage climbs steeply.
Walls far from a rig's center move fastest. The rig turns about its middle, so out toward
its ends a wall can arrive faster than you can fly, and it hits you at its speed plus yours.
Braking is your engines working the other way. Buying THRUST for a hull makes it stop
harder as well as go harder, and raises its top speed.
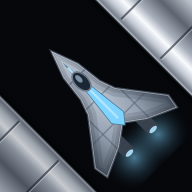
Every hull flies differently. The scout tops out at 165 and starts with 120 armor. Small
hulls like the dart are faster, turn quicker and pull away and stop harder, but carry less armor; big ones
are slower and tougher.
Some things clamp you in place: a repair pad, a rescue hall, the collector, a repair craft.
While clamped you ride the ship you're docked to. Thrust to let go. For the first half second after a repair pad or a
rescue hall catches you, your sticks are ignored, so a thumb still correcting can't pull you straight off;
the gun still fires.
The chart
The chart in the corner only shows corridor you've flown near, and inside a rig it turns with the rig.
You're the lime triangle, pointing the way you're heading.
Inside a rig it also marks the bay mouths in yellow as you pass near them, so you can read the way out
off the map (gray while the doors are shut).
Out in open space it shows the whole volume: the pickup in green, the collector in blue, a signal jammer
as a red ring, enemy capital ships as red discs with a letter once you, the Java or the Zena have been near one (W for a
warden, T for a Trident, B for a behemoth; a second ship of the same kind is amber),
and your own capital ships as solid white discs with a black letter: J for the Java, Z for the Zena.
Once you've explored half of a rig, the mission chart outlines it in blue, so you can tell which rigs you've partly or fully explored. Rigs only: a lode never gets the outline. Once every rig is outlined, if the one or two maps or blueprints you still need are all in the same rig and you've gone 30 seconds without picking one up, that rig flashes white on the mission chart.
Crystal floating loose shows on both charts as a small dot in its ore's color (voskaryn as a small
turquoise prism), and goes the moment somebody picks it up. A derelict satellite goes on the chart as a
gray outline with a colored dot once you've had a good look at it, and stays there as it drifts. A monitor dock shows as its two crescents with no mark, once you've had a look at it or come within about a third of the map of it.
03 Missions & objectives
A mission is a bounded volume of space holding one to four rigs, and sometimes lodes of ore. The edge of the
volume is solid, so there's no flying off. Its objectives are listed in the top right of the screen,
marked • while open and ✓ when done.
How a mission starts and ends
Even-numbered missions start aboard a drop transport, which carries you in and pushes you out of its side. You have control once it lights up to leave.
Odd-numbered missions start inside the first rig.
Before each mission that brings in a new kind of objective, you get a short radio briefing over a view of what it's about. SKIP it while they talk, or CONTINUE after. It plays every time you launch that mission until you've won it.
Every mission ends with one last objective that waits for all the others: either RETURN TO OPEN
SPACE or PROCEED TO THE PICKUP.
When it's done, the screen reads MISSION COMPLETE and everything eases to a stop. Press
CONTINUE. The first time you win a mission, the payout wheel follows.
The campaign currently runs to mission 60. Win it and CONTINUE plays a closing scene of
about fifty seconds; CONTINUE in the corner skips it.
A mission fails the moment one of its objectives can no longer be done: a rig destroyed
with maps, blueprints or survivors aboard that the mission still needs, survivors killed in their halls
until too few are left, a civilian ship lost, or the Corp holding the
ASI artifact for its full hold time. The screen reads
MISSION FAILED, and it counts as a loss, the same as running out of lives.
The objectives
Each card shows the line as it appears on your screen.
SURVEY ALL 3 RIGS 42%
Survey
Do: fly the rig's corridors. Any corridor within about 90 units of you, with a clear line to it, gets charted.
Done when: the average reaches 100%. Each rig counts as fully surveyed once half of it is charted, so you don't have to see every corner.
Note: with one rig it reads SURVEY THE RIG. Lodes don't count toward it. From mission 14 a mission asks for a survey about half as often, and only alongside another job; in a Challenge that's true of every mission.
RECOVER MINE MAPS 0/9
Maps and blueprints
Do: find the mine maps (wide sheets with a route drawn on them) or tech blueprints (tall, ruled sheets) lying in the rigs' corridors, and fly over them. Any part of your hull picks them up.
Done when: you have every one in the mission.
Watch out: they're invisible until you spot them. Down a clear line one appears faintly and fills in as you close on it. Through a wall you only sense it from about nine ship widths away. Later on, some are sealed inside breakable plating: shoot them out.
RESCUE SURVIVORS 0/6
Rescue
Do: the Coalition's stranded survivors wait in halls cut into corridor walls, behind a blue-and-black striped threshold. Bring your ship side-on across the opening, within 30 degrees of square, and hold it there. It clamps on and they walk aboard one at a time.
Done when: you've taken off half of all the survivors in the mission, rounded up. Everyone you save past that still shows on the line (17/14) and adds to the payout wheel.
Watch out: pull away while somebody is on the gangway and they fall. Fire and blasts reaching into a hall kill them, whoever's they are. You don't have to take everyone in one visit: those still inside wait for you to come back. Some halls are bricked over and have to be cut open first. You don't need to clear all of the plating: cut a gap across the doorway as long as your ship, then dock side-on in it.
FREE CIVILIAN SHIP
Civilian rescue
Do: from mission 27, a civilian ship can be walled into a rig, ringed with breakable plating. Cut through the ring to free it. Then the line reads ESCORT CIVILIAN SHIP TO THE EDGE: it follows you, so lead it out of the rig and across to the edge of the volume.
Done when: you're both in open space and you're within about 300 units of the edge. It flies the last stretch to the edge itself and fades out once it is over it.
Watch out: it has no guns, only a couple of flares, and the Corp goes after it. Nothing shoots at it while it's still walled in, and only your own fire can cut its ring open. Once free, it dodges fire, shies from hostiles and gets out of your way, but stay close. Lose it and the mission fails if it was the only job, or if you lose both of a pair. Otherwise, if it was your only civilian, the Corp sends a capital ship after you: a warden early on, then a Trident, and from mission 48 wardogs as well. It puts out a flight of two to four fighters every 14 seconds as it comes. Losing one of a pair brings four more ships in from the edge, and if the civilian was the last thing left, the win costs 200 credits.
Note: there are two kinds, the wide packet and the smaller clipper, both with a pink beacon that blinks once a second. Once you've found one it's marked on your chart. A rescue mission skips the survey and asks for less else.
REDEEM VELARITE 0/4
Ore contract
Do: cut crystal of that ore out of a lode and deliver it to the collector.
Done when: enough has been delivered. Ore in your hold doesn't count until it's handed over.
Note: a contract never asks for more than the rock holds, and anything you deliver beyond it is profit. See Mining.
DESTROY RIG S478 12%
Demolition
Do: bring down a rig carrying a Corp weapons lab. Its hull takes 1,500 armor, and everything that hits its plating counts: your guns, your explosions, a monitor's guns, your allies' fire.
Done when: the hull comes apart, about 15 seconds after its armor reaches nothing.
Allies: keep firing at it for about ten seconds and your allies join in. If you stop, they stay about twenty seconds, then go back to their own business, unless nothing you still need is left aboard. Then they see it through.
Watch out: the rig can be shot from the first second, and you probably shouldn't. Everything still aboard goes with it, and the mission still asks for it. Finish the rig's other work first. Once a fifth of its armor is gone, the rig calls a hull breach over its PA and three to five security ships appear inside it. When the hull gets low, the Corp rallies its ships to defend it.
DESTROY THE WARDEN
Destroy a capital ship
Do: destroy a Corp capital ship of the type named: a warden, a Trident or a behemoth. Any ship of that type counts, whoever destroys it. When the mission has more than one of them, the line reads DESTROY A rather than DESTROY THE.
Done when: one goes up. The objective is live from the first second.
Watch out: every ship of that type is on your chart from the start, and none of them withdraws to the edge of the volume. Once one has been under attack for 20 seconds, the Corp's other capital ships send flights of 2 to 4 ships after you every 15 seconds.
Note: it comes on mission 39 (a warden), mission 42 (the Trident, on its first appearance) and mission 55 (a behemoth), and on about one Challenge in four. It takes the place of another job (blueprints, maps or survivors), so the list doesn't get longer. Nikki briefs it before mission 39, showing the two orders that help: escorts following you, and the Java sent to your position.
TAKE RIG S81 34%
Take a rig
Do: fly into the zone around the rig, about half again its size, and press the action button to start the hack. Progress is decided by who's there: alone, a small rig takes about 40 seconds, and each extra ship on your side makes it a quarter faster. Corp ships in the zone cancel yours one for one, and a draw freezes the bar.
Done when: the line reads HOLD RIG, and for as long as it does.
Watch out: this is the only objective that can come undone. The Corp tries to take the rig back a few seconds after losing it, and when it's your last job, its capital ships come too. Taken, the rig's lights and corridor lamps turn blue, its guns fight for you, and any you destroyed come back. The Corp's ships will go after those guns.
Note: the first rig to take is mission 45. From mission 46, about one mission in seven also offers a single rig you can take with no objective asking; a mission that asks you to take a rig offers no other. It shows lighter on your chart and is taken the same way. Nothing makes you hold one, but the Corp will try to take it back.
HUNT THE ARTIFACT 118s / 54s
The ASI artifact
An artifact that lets whoever holds it treat the physical world like code—deleting objects, clipping through solid matter, or pausing local time.
Do: once every other job is done, a Corp courier flies the artifact in, guarded. Damage the ship carrying it and the artifact is knocked loose. Fly to it to take it. A monitor you're flying can take it and carry it too, and it comes out with you when you step out.
The courier: it leads its guards in formation to a rig inside the ring, then holds up deep in the corridors with guards in the entrances and around the hull. Corner it, outnumber it or hurt it and it breaks out of the far entrance, cut passages included, and runs for another rig. Caught in open space with few guards near, it shelters behind a Corp capital ship, which comes to meet it and launches guards for it. A hurt courier hands the artifact to a fresh guard, and the damage that guard can take before dropping it doesn't reset. Two guards always go for a loose artifact.
Your allies: they chase the courier, following it into a rig if it hides in one and cutting their own way in when that's quicker. Three go after it while the Corp's clock is full, rising to nine as it runs down. The Corp's guards follow your side into a rig the same way when you or an ally holds the artifact.
The ring: a wine-red circle about the middle of the volume, about two thirds of the way out to its edge, shown on your screen and both charts. Holding the artifact only counts inside it. The ring pulses while you hold it outside, and a rig drifting across the line can carry the artifact in or out.
Done when: your side has held it inside the ring for the mission's hold time: two to three minutes, set for each mission in steps of ten seconds, and leaning longer the bigger the volume and its rigs. The same mission always asks for the same time. Your clock, in white, runs while you or an ally carries it inside the ring and freezes while it's loose or outside. On a mission with no pickup, the clock reaching zero wins the mission outright. With a pickup, you still have to make it to the transport.
Failed when:the Corp holds it inside the ring for the same hold time. Its clock shows in red after a slash, as 118s / 54s, and runs on the same rules as yours. If it runs out, the line is crossed out in red and the mission fails. Whenever either side takes the artifact, the other side's clock goes back to the full hold time, so one interception undoes everything they'd built up.
Watch out: it's heavy: whoever carries it flies at 75% of their top speed, and the booster is weaker. Take 14 damage from weapons fire while you're carrying it and it's knocked loose, the same rule you used to take it. Bumping a wall, a rock or junk doesn't count. While your side holds it, every Corp capital ship keeps launching guards after it, sending whichever ships can reach it first, and in the last 80 seconds the capital ships themselves come for it. A cloak won't hide it, and a red arrow at the edge of the screen always points to it. About one hunt in three, a cloaked guard takes it and holds its fire to stay hidden: its glow shows dimmer, but your gun still locks on and both charts still mark it. Only seekers and crawl bombs can't follow it.
Note: the first hunt is mission 18. After that about a third of missions carry one, whatever else they ask for.
PROCEED TO THE PICKUP
Pickup
Do: once everything else is done, a transport flies in from beyond the edge of the volume and its marker appears on your chart. Fly into either side door, along the middle of its hull. The doors light green while they're open. If a rig, lode, satellite or dock drifts under it while it waits, it moves off to clear space.
Done when: it has carried you out of the volume.
Watch out: you can't board it while flying a monitor. Step out first: the warship stays behind.
RETURN TO OPEN SPACE
Return to open space
Do: once everything else is done, get clear of every rig and lode. A mission with an ASI artifact hunt and no pickup skips this: holding the artifact to the end wins it.
Done when: you're outside all of them.
Hidden rule
The leaving objectives always wait. The pickup won't come and open space won't count until
every other line is ticked. The artifact courier waits too: it only flies in once everything but leaving is
done.
Vaults and hidden items
From mission 20 the rigs are built differently. Each end has a chamber reached by wide tunnels, some
tunnels end in breakable plating that joins two corridors, and some corridors open out into rooms. About
half the rigs also hide vaults: sealed rooms in the thickest plating, with every way in
ending in breakable plating, so the only way into one is to cut.
A rig may hide a held item. About a third of rigs carry one, a vault rig more often and
sometimes two, and a mission has at most three. It lies in a vault if the rig has one, otherwise at the end
of one of the furthest dead ends.
It's on no chart. You see it only while you're aboard that rig: whole when you have a
clear line to it, as a faint outline through plating, and brighter within three ship widths.
Fly over it to take it, in your own ship or a monitor, with nothing solid between you.
Corp ships can't take it. It goes into your hold, drawn from the same odds as the collector's awards (no
Repair Call before the Java), and like any gain it's kept only if you win.
Some rigs have no short way out. On about a third of them the only ways out to space are
long cuts through thick plating, which matters if the doors shut on you. A self-destruct's fuse allows for
the extra cutting.
What can change mid-mission
Some missions have more in store than their list says. A rig can shut its doors on you, a
signal jammer can take your chart away, and the Corp can bring reinforcements. These are
covered under Hazards. From mission 40, the Corp also closes in on you as you near
the end of a mission: see The Corp's answers.
04 Earning credits
Credits are what the shop takes, and nothing else in the game spends them. They come from five
places, and they are not all kept on the same terms.
Where credits come from
Damage: 1 credit for every point of armor you take off anything hostile.
Kills: a bounty on top, worth the target's full armor divided by 1.4.
Ore: 12 to 34 credits for every crystal you deliver to the collector, and 136 for a voskaryn.
The payout wheel: 25 to 300 credits, after a mission you've won for the first time.
Ace Mode: 125 credits the first time you win a mission with no primary gun, from mission 3. Ace Mode is always a replay of a mission you've already won.
Daily and weekly goals: 25 to 125 credits for a daily goal and 100 to 225 for a weekly one, or a held item instead. See Goals.
Damage and bounties
Every round that lands on a hostile pays for the armor it takes off, one credit a point. Upgraded rounds
that hit for a fraction more pay that fraction too: the remainder is carried, so four rounds of 1.25
pay five credits between them. Destroy the target and you are paid a bounty on top of the damage:
its full armor divided by 1.4, rounded.
What a kill is worth, destroyed from full armor
Target
Armor
Damage + bounty
Interceptor
8
8 + 6 = 14
Wall cannon
4
4 + 3 = 7
Hull cannon (outside a rig)
12
12 + 9 = 21
Signal jammer
40
40 + 29 = 69
A warden's turret
39
39 + 28 = 67 each
Warden or Trident hull
563
563 + 402 = 965
Behemoth hull
638
638 + 456 = 1,094
Hidden rule
A target never pays more than it was worth. The damage credit on any one hostile is
capped at its full armor over its whole life. Overkill pays nothing extra, and a hostile that limps off
to a repair pad and comes back cannot be paid for twice.
Hidden rule
Early hostiles are worth less. In the opening missions the Corp's ships fly with
about half the armor their class is worth, rising to full strength by mission 17. The same class pays
more later in the campaign, because there is more of it to shoot.
Hidden rule
A mission's fighting pays once, at your best attempt. Until you win a mission, each
attempt that ends in a loss or a walk-out pays only what it earns beyond your best attempt so far. Fly it
again for 100 credits after a run that earned 60 and you get 40 more; earn 50 and you get nothing. Leaving
early and retrying doesn't farm credits. The win pays its own fighting in full, whatever
the earlier attempts earned.
Pays
Your guns, primary and special
Your own explosions: warheads, mines, crawl bombs, nades, nukes and exploding-tip splash
Ramming a hostile (it is booked on your record as RAMMING)
A monitor's guns and rams, while you are flying it
Capital ship hulls, and each of their turrets separately
Wall cannons and the signal jammer
Never pays
Rock, space junk, canisters and rig plating
Allies, and anything your allies or the Java's orb destroys
Kills made by your sentry and bastion turrets
Rounds thrown back by a cyan shield
A hostile caught in another hostile's explosion
Shooting down missiles, or setting off the Corp's mines
Anything an empty, drifting monitor runs over
Ore
Every crystal you deliver to the collector pays by its kind: 34 for velarite,
20 for dravithe and 12 for talvorite, and a voskaryn pays 136. Ore credits are held separately until
the mission is won, and lost if it isn't. See Mining & crystal energy.
The payout wheel
Win a mission for the first time and press CONTINUE, and an octagon of eight lit sections comes up. Each
section holds a different amount of credits, from 25 to 300 in steps of 25, and three of the sections also
carry goods: an extra life, a powerup or arsenal item (sometimes two of
it), or, rarely and never more than once on a board, a step on one of your weapon's upgrade
dials. The more steps you've already bought on a dial, the less often it comes up.
For two seconds the screen says TAP FAST. Then the light runs round the ring, slows, and stops on the
section that pays.
Every tap reveals what one section is carrying.
Every fourth tap raises the poorest section by 25 credits, up to four times, to a ceiling of 300.
Bonus prizes: your mission earns up to 12, an item and an extra life in turn (below). A
share of them lands on the board by itself before the light runs: about 30% after a mission barely won,
up to 90% after a perfect one, and never fewer than one or two. Tapping adds the rest.
How much tapping adds depends on speed and spread: fourteen taps in the two seconds is
full speed, and taps all round the eight sections count far more than a burst on one spot, which earns
two fifths as much. Any tap at all adds at least one. With a keyboard or gamepad, aim at a side of the
ring with WASD, the stick or the D-pad, and tap with Space, Enter, A or RT.
A section holds at most four prizes. Lives are spread out: every section gets one before any gets a
second, and none gets a third.
Hidden rule
Where the light stops is decided before your first tap. Tapping can't move it, but it
can fill the section it lands on. The credits and goods are banked the instant the light stops, before
any card appears, so nothing is lost if you leave early.
How many bonus prizes a mission earns comes from three measures:
What a well-flown mission adds to the wheel
Measure
Counts as
Hostiles destroyed, out of every one that flew: the ships the mission opened with, hangar launches and capital ships. Ships still in a hold don't count
The core
Survivors rescued, out of every one on the mission. Left out on a mission with none
The core, averaged with the hostiles
Motherships destroyed or badly damaged, out of all the mission had. Badly damaged is a rig to demolish past half its armor, or a rig with half its guns shot off
A quarter on top
Up to 8 prizes come readily, in proportion to how well you did. The last 4, a full board, are each a roll
whose odds climb steeply only near the top. Half the hostiles and half the survivors earns about 5 prizes;
every hostile and every survivor, with no mothership touched, about 9; every measure full, all 12.
Before any bonus prizes, about three landings in eight carry goods: a powerup or arsenal item about 26% of
the time, an extra life about 15%, and a weapon upgrade up to about 8%, less once you've bought steps on
your dials. The credits average around 160. An item you already hold five of comes up half as often, and
ten of a quarter as often, so the wheel hands you something different instead.
Daily and weekly goals
GOALS on the cover holds three daily goals and three weekly goals, each with its own
reward. Daily goals change at midnight UTC and weekly ones on Monday at 00:00 UTC. Everyone at the same
stage of the campaign gets the same goals, picked by the furthest mission you've reached: missions 1 to
12, 13 to 35, or 36 and on.
What they ask: destroy hostiles, wall guns or a particular class; destroy capital
ships (weekly); recover maps or blueprints; rescue survivors; mine talvorite, velarite or, late on,
voskaryn; win different missions; win missions without losing a ship. A goal marked
IN ONE MISSION must be done in a single run. Mined ore counts whether it's delivered or
still in your hold.
What counts: only won missions, a replay as well as a first win, but never a
Challenge. Each mission counts once per goal, by its best run, so winning
the same easy mission again raises what that mission is worth toward a goal but doesn't add to it.
And only recent missions count: those within 10 of the furthest you've reached, or a
quarter of the way back if that's further (at mission 60, missions 45 and up). Ore and survivor goals look
back 20. The GOALS page says COUNTS MISSION 45 AND UP, and those cards are green on the mission
deck.
What they pay: 25 to 125 credits for a daily goal and 100 to 225 for a weekly one,
or a held item instead. Harder goals pay more, pay an item more often, and offer the rarer items more
often too.
Claiming: a met goal waits with a CLAIM button on the GOALS page and
as a card above PLAY. It never expires: a reward from a set that has closed waits under TO
CLAIM. Goal progress belongs to your account, so wins in any of your campaigns count. Each reward
is paid once, into the campaign you're playing when you claim it; with more than one campaign, switch to
the one you want it in first. See Campaigns.
Offline: won missions still count, against the goals your game last downloaded,
which reach up to a week ahead. Rewards are paid once you're back online.
Hidden rule
Rewards go by the server's clock, not your device's. A goal met while your device's
clock was set back counts toward nothing, and one met with it set forward waits until the real time
catches up before it pays.
05 Mining & crystal energy
The Corp's mind runs on crystal hauled from the belt, and so does the Coalition's. From mission 12,
missions start to carry lodes: drifting bodies of rock, bored through with passages and
seamed with ore. Each is painted with a designation like LODE L508.
Velarite
34 CREDITS
Rare: about 1 crystal in 6. Six facets, hot magenta.
Dravithe
20 CREDITS
About 1 crystal in 3. Four facets, violet.
Talvorite
12 CREDITS
Common: about half of all ore. Three facets, dusty rose.
Voskaryn
136 CREDITS
One per lode at most, from mission 33. A tall clear lavender stone with colored light running through it.
Cutting it out
A lode holds 18 to 62 crystals depending on its size, and about three quarters of them are
buried. The rock around a lode's passages is nearly all breakable: shoot it away to reach them.
Buried ore shows faintly through the rock once you are within about three ship widths, enough to tell
which ore it is but not exactly where. Cutting is what turns it into a crystal you can collect.
Once you've cut about 20 cells of a lode, every 10 to 30 seconds a patch of small dots in a crystal's
color fades up on the rock around a buried crystal further off. The crystal is somewhere inside the
patch, not always in the middle. While your contract still needs ore, the hints come sooner and favor
the kind it's short of. The deepest crystals, and voskaryn, are never hinted. On ROOKIE the hints start
after about 10 cells and come every 6 to 18 seconds.
Fly over a crystal to pick it up. Your hold readout shows what you're carrying and what you've delivered.
Magma lies under some of the rock, in pools that come up, hold and die away on a
steady cycle. Cutting into rock is how you find them, and a pool at full heat burns about 24 armor a
second.
The collector
Every mission with a lode also has a collector: a long gray freighter with gold trim,
holding station out in open space and marked on your chart with a blue dot. Ore is only worth anything once
it's handed over here.
A docking rail runs along each flank; its lamps chase toward the middle, and while ore goes across they
light in that ore's color.
Come in close against either side, along the middle of its hull, pointing any way you like. The
first time you carry a crystal, a card reminds you. It clamps you in place and takes your ore one crystal a second. A bar over your ship fills as it goes, in the color of the ore crossing.
The whole hold is paid when the transfer finishes. Pull away early and it simply starts over next time.
You can deliver as often as you like. There's no bonus for hoarding, and a full hold makes you a target.
Ore contracts
Two lode missions in three add a line per ore, like REDEEM VELARITE 0/4. A contract names
velarite, talvorite or both, never dravithe: dravithe is always yours to mine for credits and lives. These
count ore delivered, never ore carried, and never ask for more of an ore than the rock holds. What a
contract asks for is well under what's down there: anything you deliver beyond it is profit. On ROOKIE,
before mission 24, each contract line asks for 60% as many crystals, never fewer than one.
Ore buys extra lives and items
Delivered in a single mission, every 2 velarite, 4 dravithe or
6 talvorite buys an extra life on the spot. Each ore counts toward its own total, several
lives can come from one delivery, and leftovers don't carry over to the next mission. In a
Challenge, ore buys items but no lives.
On top of that, every 100 credits of ore you deliver in a mission earns a
powerup or arsenal item, straight into your hold: its control on the HUD flashes and a small
box names what you got (two of a kind reading +2). A life bought this way flashes the heart beside your armor.
A fully worked lode is worth about six lives and four items. Like the ore credits, lives and items
earned this way are only kept if you win.
Voskaryn
From mission 33, a lode can hold one voskaryn: always on mission 33, then about half the
lodes after it. It sits deep in the core of the rock, so reaching it takes a lot of cutting. It's worth
four velarite, and both sides want it.
You deliver it: 136 credits, plus an extra life, a cyan shield, a random powerup and two
random arsenal items, all kept if you win the mission.
The Corp delivers it: every wall cannon you destroyed is rebuilt, every drained repair
pad is restocked, and a squadron of four to six ships appears at the collector.
Ore contracts never ask for voskaryn, and its line on your hold readout only appears once you have one.
Watch out
Lose your ship and everything in your hold spills into space as loose crystal. You can go back for it,
and so can the Corp's miners.
The Corp mines too
Some Corp ships carry a turquoise cutting beam and work the same lodes you do. A miner carrying crystal
pulses pink. They fly their ore to the same collector, and what they deliver repairs the
rigs you've been fighting through: every 48 credits of their ore rebuilds a wall cannon you destroyed, and
every 30 restocks a repair pad.
Shoot a loaded miner down and its hold spills into space for either side to take.
Miners only ever take ore beyond what your contract still needs, so they can cost you profit but never the mission.
A loaded miner calls an escort before its run to the collector. With its hold three
quarters full it asks one nearby ship; carrying a voskaryn it asks three. It leaves the rock and waits
in open space for them, up to 35 seconds, then runs at full speed with them around it. Attack it while
it waits and it goes at once, with its escorts catching up.
Your allies chase loaded miners. A Corp miner carrying crystal within about a screen of
one of your ships gets a chaser, or two for a heavy load or a mauler. Ships with no orders go first; a ship
you've dispatched only goes if another can take its order over. They fly to cut it off, and only ships fast
enough to catch it are sent.
A prospector carrying crystal is fair game to your allies, though your own automatic guns still leave it alone.
The crystal energy race
Two bars sit in the top right of the cover screen and the mission deck: ZENITH CRYSTAL
ENERGY in white and CORP. CRYSTAL ENERGY in yellow. They measure the credit value
of the ore each side has delivered across the campaign. The bars are scaled against whichever side leads,
and a +N inside a bar shows what the last mission added.
Each side keeps its best attempt at each mission, not the total of every attempt. Flying a mission again only adds the difference if you beat your own best there, and the Corp gets the same chance: if its miners beat their best on that mission, its figure rises too.
Energy is banked when a mission is won, when it's lost with no lives left, and on a replay. Walking out to the hangar banks none.
Nothing is shown until one side has delivered something.
Why it matters
Falling behind makes the Corp harder to stop. Once the Corp leads by 15% or more, its
loaded miners fly with an escort guard, and a bigger lead brings more guards. And if you're hunting the
ASI artifact while the Corp leads on energy and you're winning the fight, it sends an extra capital
ship. Keeping level with the Corp is what keeps that pressure off.
06 Lives & respawning
A life is another go in the ship you're flying. A new campaign starts with three ships in
hand: the one you fly, and two extra lives. The green heart on your HUD shows how many extra lives you
have, and disappears when you're on your last.
Every mission starts with at least one ship, and every mission starts on a full hull.
Extra lives come from delivering ore (see above), from the payout wheel, and now and then from a destroyed Corp ship, which can leave a heart.
Losing a ship with a life left
A wreck isn't the end of a mission. A RESPAWN button appears a second after you're lost,
under a large count from 10 down to 1, and the volume carries on around the wreck: the rigs keep drifting,
the hostiles keep hunting, and everything you've done stays done.
Only pressing RESPAWN spends a life. Let the count run out and the button becomes CONTINUE, which leaves the mission as walking out does and keeps every extra life you had. The count pauses while the game is paused.
You come back where you were lost. The wreck holds its spot, riding the rig it died in, and the new ship is moved to the nearest clear space if anything is sitting there now. If you were inside a rig, you come back inside that rig.
A fresh ship gets three seconds in which nothing can hurt it. It blinks while that lasts. Your ship gets the same three seconds when it first appears in a mission.
Full armor, cooldowns cleared, and you can choose which hull from your loadout to come back in.
Your hold spills into space, and any shield you had up is gone.
Losing your last ship
The screen reads SHIP DESTROYED and the button says CONTINUE. The mission
is over. What you keep from it is set out in the next section, and the next attempt starts with at least
one ship. There's no game over: you can always try the mission again.
07 Wins, losses & what you keep
There are four ways out of a mission, and they don't keep the same things. The rule underneath all of
them is simple: losses are permanent the moment they happen, and gains wait for a win.
What each ending keeps
Item
Win
Out of lives
Walk out
Replay
Credits from fighting
Kept
Best⁴
Best⁴
None
Credits from ore
Kept
Lost
Lost
None
Lives lost
Gone
Gone
Gone
Back
Lives earned from ore
Kept
Lost
Lost
None
Powerups & arsenal used
Gone
Gone
Gone
Back
Payout wheel
Yes¹
No
No
No
Record: kills & losses
Yes
Yes
No
No
Record: missions & haul³
Yes
No
No
No
Flight time
Yes
Yes
Yes
Yes
Crystal energy
Best²
Best
No
Best
Next mission unlocked
Yes
No
No
—
¹ Only the first time you win that mission.² Each side keeps its best attempt at each mission, not the sum of every attempt.³ Missions won, and the maps, blueprints, survivors and ore you brought back.⁴ Paid once per mission, at your best attempt: a run pays only what it earns beyond your best before it. See Earning credits.Back: given back at the end of the replay.
How the rule works
The game saves as you play, not at the end, so it can be honest about the two ways out that never reach
an ending: walking out through the hangar, and closing the page.
Credits from fighting are saved as you earn them, at most a second behind. They're yours
whatever happens next. Until you win the mission, a run is paid only for what it earns beyond your best
attempt at it.
Anything you spend is gone the instant you spend it. A life lost or a shield raised is
saved straight away.
Anything you gain above what the mission started with waits for a win. You can use it
during the mission, but it isn't saved until the mission is complete. Win, and it's kept. Leave or lose,
and it's dropped.
Hidden rule
Gains are measured against where you started, not against what you earned. Start with
four ships, earn two from ore, then lose three: you finish on three, below where you began, so there's
no gain to hold back. All three are yours even if you walk out.
Tip
Walking out isn't free, but it isn't a waste either. Leaving through the hangar
button (offered while paused, pressed twice) keeps the credits you earned fighting, beyond
your best earlier attempt, and drops the haul. Closing the page mid-mission does the same.
Watch out
After MISSION COMPLETE, press CONTINUE to collect the payout wheel.
Leaving for the hangar at that point skips it.
Your record
The STATS page on the cover screen reads straight off your save:
Service: missions flown (first-time wins), ships lost, and flight time. Flight time counts every run, including ones you walk out of and Challenges; Challenges' share shows as CHALLENGE TIME.
Recovered: mine maps, blueprints, survivors off and survivors lost.
Ore: voskaryn, velarite, dravithe and talvorite delivered.
Destroyed: every class you've killed, with its silhouette, so the list doubles as a field guide.
By weapon: the same kills, by what did them, including MONITOR and RAMMING.
08 Retries & replays
Press PLAY and the mission deck deals a card for every mission you've reached. The card in the middle is
the one you'll fly, and you can drag the deck, tap a card or use the arrows to choose another. The newest
mission's card is white. Missions you've already won are gray.
Retry
Flying a mission you haven't won yet, as many times as it takes. Every attempt is an
ordinary run: credits from fighting are kept, losses are permanent, and gains wait for the win.
Replay
Flying a gray card, a mission you've already won. No credits, no lives lost or gained,
powerups and arsenal items you use are given back, and your record doesn't change. Only your flight
time and the crystal energy race count: beat your best crystal delivery on
that mission and your figure rises, but the Corp's miners get the same chance at theirs. A replay still counts toward your goals. One exception: the first time you win a
replay with no primary gun, from mission 3 on, it pays a 125-credit ACE MODE bonus.
Why it works this way
A beaten mission can't be farmed for credits or lives, and flying an old one again just for fun, maybe in
the ship you fly now, never costs you credits, lives or items. The deck offers those cards so you can do exactly that.
Any mission, new or replayed, can be recorded: turn on REC beside PLAY on the deck, and
watch or save it afterwards. See Recording a mission.
09 The shop
The SHOP on the cover screen has four pages: HANGAR for hulls and their upgrades,
WEAPONS for primary guns, EXTRAS for special weapons and equipment, and
ALLY for refitting the Java and buying the Zena. What you buy is fitted on the LOADOUT page. Every ship, weapon and dial is listed on the
Menus page.
What each item does is in its own part of the manual: hulls under Ships,
guns, special weapons, shields and the arsenal under Weapons, and the
ALLY page under Capital ships & allies.
Every purchase takes two presses. BUY turns to AGAIN for a moment, and pressing it again spends the credits. A press anywhere else cancels.
Nothing is ever sold back.
A hull is paid off in installments with a slider, and money put toward a hull stays on it.
A weapon no hull you own can carry shows NO SHIP COMPATIBILITY and can't be bought until you own one that can.
10 Allies & the Corp
You fly for the Zenith Coalition, marked in white. Everything flying for the
Corp is hostile: its rigs, its guns, its ships and its capital ships. Later in the campaign
the Coalition sends ships of its own.
Every class of Corp ship and wall gun is on the Enemies page, and the
capital ships of both sides, the Java's escorts and how to order them are on
Capital ships & allies.
The radio
Two people talk to you over the Coalition's radio: the flight crew of Battlegroup Invicta, one of several Coalition battlegroups running operations across the belt at once, and among its most decorated. Their card shows in the top right while they speak, with their words written out, since most phones play muted. Their full introductions are on the cover's SCENES page.
LEOFLIGHT OPERATIONS
Wing commander, Battlegroup Invicta. From Boston, Massachusetts. Three times decorated, with nineteen years in the Coalition: he flew scout picket on the outer belt, then ran deck operations aboard the carrier Halvard until it was lost at the Kessler Gap, and talked forty-one pilots home through that withdrawal. Now he sees every new pilot through their early missions.
Your handler, from mission 1. He briefs each new objective up to the Java's arrival, calls out what you meet for the first time, and reacts to how a mission goes: doors shutting, the job done, a delivery, an extra life, a respawn. He warns you off friendly ships before the Coalition's fleet arrives. The first time you meet something where instinct is wrong, he tells you what to do instead: a kamikaze, a Corp mine, magma, a cloaking ship, a bolide's sight, voskaryn, a hidden prize, the Wardog. The first time you mark a target, he explains the mark.
NIKKICAPITAL DISPATCH COMMANDER
Commander, Battlegroup Kestros II, on assignment with Invicta. From Pomfret, Connecticut. The youngest officer ever given capital dispatch: a fleet logistics officer before the war, she routed the convoys that kept the Java supplied through the first Corp offensive, and holds the Coalition's record for escort flights launched without a loss.
Commands the Coalition's capital ships. Leo hands you over to her at mission 36, when the Java arrives. She briefs the Java, the demolition and taking a rig, answers your orders to her ships, the Zena and Repair Calls, calls for help when her ships are under attack, and warns you if you turn on them.
Briefings play before missions 1, 13 (mining), 14 (rescue halls), 17, 18, 27, 36, 38, 39 (destroying a capital ship) and 45, every time you launch one of them until you've won it. Never on a replay or in a Challenge. Mission 1's opens with Leo introducing himself and Battlegroup Invicta. Any briefing you've reached can be watched again from SCENES on the cover.
During a mission one voice talks at a time. Most lines are said once ever, and the ones that come round again change their wording. A Challenge never uses up a once-ever line: those wait for the campaign mission they were written for. Once your last ship is destroyed the radio goes quiet; while you still have a life to come back with, it carries on.
The RADIO settings turn the card, the briefings or the chatter off. See Settings.
Friendly fire
Direct fire never crosses sides. Your rounds pass straight through allies, including the guns of a rig you've taken, and theirs pass through you.
Explosions and ordnance hit everyone, you included. A missile is something you chose to put in the air near a friend, and an ally's rocket or seeker that reaches you hits you, or the monitor you're flying.
Kills made by allies pay you nothing and don't go on your record.
Don't make a habit of hurting your own side. The Coalition notices when you damage or destroy its ships, and you'll hear about it on its radio. Keep it up and it will be dealt with. Hurting an ally never pays, and every one you destroy is counted in red as ALLIES DESTROYED on your stats.
11 Hazards
A field guide to what the rigs and the belt will put in your way. The Corp's wall guns are on the Enemies page, and the monitors you can board are under Ships.
Steam and flame outlets
Heat exhausts for the rig's mainframes, set into the corridor walls. Steam burns about 22 armor a second and shoves you along with
it. Flame burns about 58. Most outlets vent on a steady rhythm of a few seconds: learn
the beat and cross between bursts. About a quarter of steam outlets never stop, but a flame outlet always
goes out eventually, and an outlet whose jet reaches a map or blueprint always cycles. A jet reaches a few ship widths and widens as it goes, so hugging the wall beside
one is often a way past, and clipping its edge costs little. A lit outlet sets off any warhead that flies
into it, except a crawl bomb, yours or the Corp's: that only takes damage, a little from steam and a lot from
flame, and goes off if the outlet wears it down.
Repair pads
Striped platforms standing out from corridor walls. Every rig has at least one. Back onto one tail-first, nose pointing
away from the wall, at no more than 60 units a second. The pad catches you a little above its deck, sets you
down, clamps you in place and repairs a tenth of your armor every second until you thrust away. Your nose can
be well off straight.
One ship to a pad. Whoever is using one, you, a Corp ship or a tank, holds it until they
leave. You can take a pad from a ship still on its way to it, but not from one already sitting on it.
Hidden rule
A pad is a reservoir, not a single use. It holds half your full armor. Take a little and
leave, and the rest is still there when you come back. Drain it completely and it goes dark for 45
seconds, then comes back a tenth smaller. After five complete drains its stripes turn red and it's spent.
Corp ships use pads too, and Corp miners can restock them. A ship heading for a pad or sitting on one still fires at
anything that crosses in front of its nose, so don't fly across its bow.
Repair wrenches
About one destroyed Corp ship in three leaves a small copper wrench where it died, copper so it's never mistaken for the steel wrench of the Repair Call powerup. Fly over it to repair a tenth
of your armor. It lasts about twelve seconds, flashes four times, and fades. Anything at full armor
passes over it without taking it. Damaged ships go after them too: a hurt ship with nothing better to do detours
for one nearby, and a badly hurt Corp ship will break off a fight to reach one. Get there
first, or shoot it down on the way.
Hearts
A Corp ship or tank you destroy within about a screen of you sometimes leaves a heart
instead of a wrench: a card with a green heart that beats. Fly over it for an extra life.
The odds go by how many extra lives you already have: 12% with none, 6% with one, 2% with two or more.
With no extra life, they climb the longer a mission runs: after five minutes without a spare or a heart
taken, every minute adds a quarter again, about 37% by ten minutes and certain by about fifteen. Taking a
heart ends that for the mission. At most two a mission (four on ROOKIE from mission 16), never from a
capital ship or a wall gun, and none in a Challenge. Only you can take
one, at any armor. It lasts 20 seconds, then flashes and goes. Like everything else you gain in a mission,
it's yours to keep only if you win.
Breakable plating
Some panels in every rig are a shade darker than the rest. Your rounds and your explosions cut through them,
opening a new way in or out. Your gun won't aim at plating on its own, so hold the trigger to cut. Rock and
blasts break it too, and so does every round that reaches it, whoever fired it: a wall gun's shells can open
the panel behind you. Later in the campaign, some halls and samples are sealed behind it.
Lockdowns
A rig can shut every door while you're deep inside it, usually once you've done most of its
work. Every bay mouth becomes solid wall. A rig that does this always has one to three breakable passages
you can cut your way out through. An ordinary lockdown opens again on its own after five to eight minutes,
and it happens at most once a mission. When a rig shuts its doors on you, up to three of your allies
outside cut their own way in to you, and the passage they cut is a way out.
Self-destruct
Some rigs that shut their doors are destroying themselves. A siren sounds, the corridor lamps beat red,
the running lights outside turn red, an announcer counts down, and a T-137 s readout
appears at the top of the screen.
The fuse is set when the doors close: the more that's still aboard and the thicker the escape passages,
the longer you get. At zero the rig tears itself apart and is gone, along with everything still inside it,
including you if you're there. The mission still asks for whatever was aboard, so get it
out before the end, or the mission fails.
When a rig goes up
A rig that goes up, whether its fuse runs out or you demolish it, takes a wide stretch of space with it.
In the last seconds every ship near it, Corp and Coalition alike, gets clear. An ally you've ordered
there keeps its order unless it's standing in the blast, and then the order is cancelled so it can run.
If you're outside the rig and nothing is after you, the camera pulls out to show the whole rig from five
seconds before it goes until three seconds after, then comes back. You keep flying throughout. A fight, a
hit, or rock heading your way ends it, and so does the red cross on the zoom groove.
The signal jammer
A Corp broadcast platform with no guns, guarded by a handful of ships, that turns up partway through some
missions. While it's alive, your chart fills with static for seconds at a time, and the pickup's marker is
hidden. A burst of static sounds the first time it jams. Destroy it to get your chart back. It's dark gunmetal lit red, like the Corp's fighters, and a wave of red
runs out along its antennas while your chart is jammed.
Rock, junk, canisters and satellites
Asteroids drift through every volume. Your gun breaks them, and a giant takes a lot of breaking. Hitting one at speed hurts. Rock that drifts into a rig cuts breakable plating and can destroy wall guns. Any explosion damages the rock inside its fire, so a warhead going off on a big rock breaks it.
Heated rock glows, with cracks of fire across a dark crust. From mission 9 a tenth of the asteroids are heated, 15% from mission 27 and a fifth from mission 30. One burns any ship within twice its own radius, yours, the Corp's and your allies' alike: 7.5 armor a second at its surface, falling to 2.5 at the edge of the heat. It hits a quarter harder than ordinary rock, sets off a canister it touches, and its pieces stay hot when it breaks.
Ice rock is blue and white, with cracks and no glow. From mission 40, on three missions in four, a quarter to two fifths of the rock that isn't heated is ice, and on a quarter of those the field is an even mix instead: a quarter ice, a quarter heated, half ordinary. It slows any ship near it, yours, the Corp's and your allies' alike (never a capital ship), over the same reach a heated rock burns. Every time one breaks it leaves an ice pool that slows whatever is in it for about fifteen seconds before it thaws. Inside a rig a pool spreads along the open corridor from where the rock broke, and onto plating you shoot away beside it.
Space junk, cool silver debris against the asteroids' warm brown, collects in and around the rigs. Shots and blasts shove it about, and it never stops drifting, so a rig moving through it keeps meeting it. Flying into it at speed costs armor. The Magnetico accessory picks it up and throws it.
Derelict satellites drift in open space from mission 20, five to eight of them, each two to four times the size of the biggest asteroid. They're heavy and barely move when hit, and every weapon stops on their hulls, yours and the Corp's alike, so they make good cover. Ramming one at speed hurts like hitting a wall. They carry 1,000 to 2,400 armor and show an armor bar once damaged. Destroy one and it goes up in two small blasts, then one about the size of a Mini Nuke. Nobody owns them, so destroying one pays nothing. The push field and a held charge lance shove and turn them, the Rig Staller stalls them as it does a rig (in half the time), and a Magnetic Charge sticks to them. One drifting into a rig nudges the rig a little. Sentry and bastion turrets bolt to them, and sticky bombs stick to them.
Canisters are pale yellow cylinders with a lamp on one end, often racked against corridor walls. They explode when destroyed, and the blast hurts everything near it, you included. The lamp warms from blue through yellow and orange to red as one takes damage.
12 Glossary
Rig
One of the Corp's orbital motherships, painted with a designation like RIG S364. Hundreds of units of corridor, drifting and turning.
Lode
A drifting body of rock in the belt, bored with passages and seamed with crystal ore.
Scout
The ship every pilot starts in.
Hull
A type of ship, bought in the shop's HANGAR.
Life, extra life
One more go in the ship you're flying. The green heart on your HUD counts your extra lives.
The hold
What you're carrying between missions: your lives, your powerups and your arsenal.
Powerups
The hold shelf for shields, the Rig Staller, the Repair Call, the Wormhole and the Time Freeze.
Arsenal
The hold shelf for weapons used up by count: the two nukes, the Shrapnel Bomb, the Magnetic Charge, the Elastic Field, the Sidewinder Salvo and the two lance volleys.
Special weapons, accessories
Bought equipment beyond your primary gun. Special weapons are ordnance and placed guns. Accessories are flares, the cloak, the Amplifier, the tracker, the booster and the Magnetico.
Streams
How heavy a hull's rounds are. A two-stream hull (Halberd and up) fires the same rounds as a one-stream hull, each carrying both streams: 1.5 times the damage, not double.
Dial
One upgrade ladder on a weapon or hull, shown in the shop as now > next with its price.
Bounty
The credits a kill pays on top of the damage: the target's full armor divided by 1.4.
Voskaryn
A rare fourth crystal, one per lode at most, worth 136 credits and a haul of items to whichever side delivers it.
Collector
The gray freighter you deliver ore to. A blue dot on your chart.
Crystal energy
The value of the ore each side has delivered across the campaign, shown on the cover screen.
Drop transport, pickup transport
The ships that carry you into a mission and out of one.
Bay mouth
An opening in a rig's hull, marked with a yellow hazard band.
Repair pad
A striped platform you back onto to repair.
Rescue hall
A hall cut into a corridor wall, behind a blue-striped threshold, where survivors wait.
Civilian ship
A packet or clipper walled into a rig, which you cut free and escort to the edge of the volume.
Monitor
A warship berthed in a rig or parked at a dock in open space, which you can board and fly. The Barge, the Miro and the Zaha.
Warden, Trident, behemoth
The Corp's capital ships.
The Java
The Zenith Coalition's capital ship, and the hangar your escorts fly from.
Escort, repair craft
Coalition ships carried by the Java, and the ships you dock on to be repaired.
The Zena
A Coalition gunship you buy, and call in during a mission.
Signal jammer
A Corp platform that fills your chart with static while it's alive.
Satellite
A derelict hull drifting in open space from mission 20. Cover from any side, and somewhere to bolt a turret.
Vault
A sealed room in a rig's thickest plating, from mission 20, reached only by cutting. Often where a hidden held item lies.
Tank
The Corp's ground unit: a turret on tracks that drives one rig's corridor floors. The grey-green tracker also lobs shells.
Wardog
The Corp's patrol ship, from mission 48. It stands off the rig you're in and fires in through the openings.
Lockdown
A rig shutting every door while you're inside it.
ASI artifact
An artifact that lets whoever holds it treat the physical world like code—deleting objects, clipping through solid matter, or pausing local time.
Mission deck
The cards dealt when you press PLAY: one for every mission you've reached.
Payout wheel
The octagon of prizes after a mission's first win.
Retry, replay
Flying a mission you haven't won yet, and flying one you have.






 Canisters are pale yellow cylinders with a lamp on one end, often racked against corridor walls. They explode when destroyed, and the blast hurts everything near it, you included. The lamp warms from blue through yellow and orange to red as one takes damage.