Every button, dial and setting
A tour of every screen in the game outside a mission: what each option does and what it changes once you're flying. Flying, firing and the buttons on screen in a mission are on the Controls page, and the rules of the game itself are in the Field Manual.
Contents
01 The cover screen
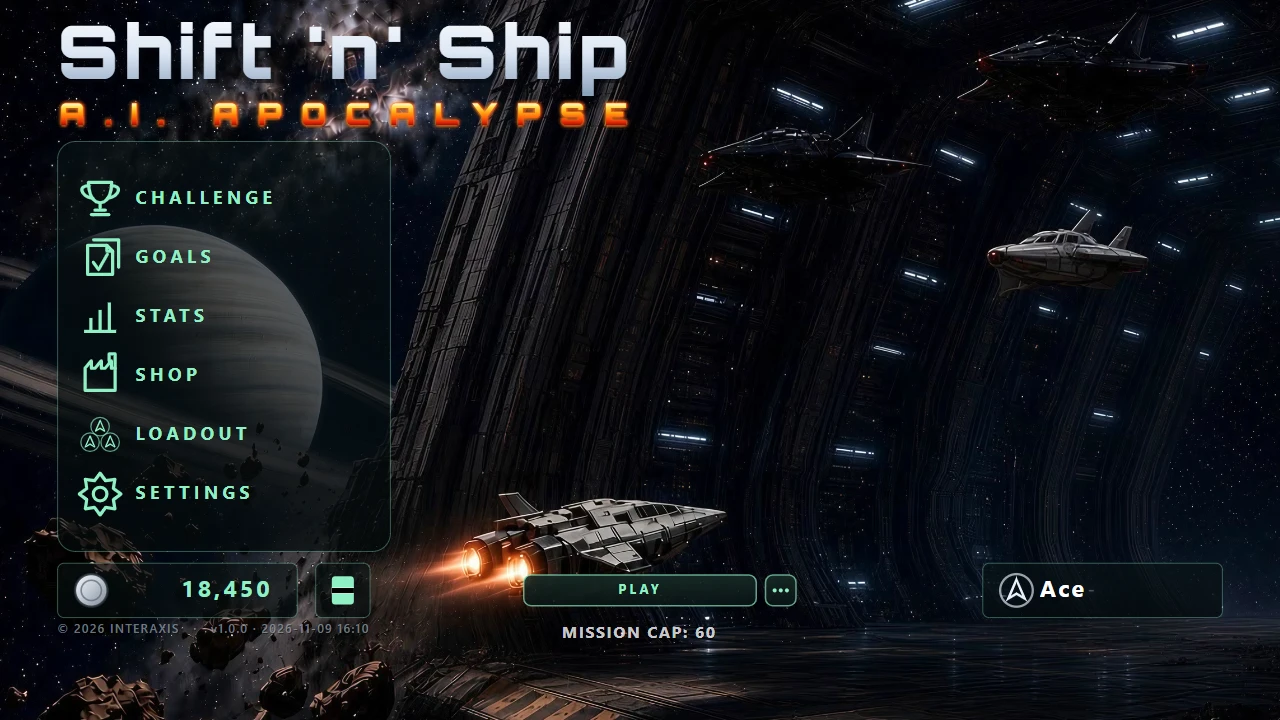
Each launch opens on the studio credit, A GAME BY over the Interaxis logo, for about four seconds; a press hurries it along. Then the game opens on a poster. A white flash burns off, the title fades in, and after about three seconds the PLAY button appears at the bottom with the menus beside it. Nothing answers a press before it's visible.
The very first time, the game offers to save your progress: continue with Google or Discord, log in or create an account with an email, or play as a guest. Signed in, your campaign is kept on shiftnship.ai and carries between devices. Every sign-in screen has an unticked box, Send me game highlights and update announcements from shiftnship.ai. Tick it to get email updates; you can change your mind any time in Settings. Nothing about an account is needed to play, and you can sign in later from your pilot name. A brand-new pilot then goes straight into mission 1; every later launch opens on the cover.
| Control | What it does |
|---|---|
| PLAY | Deals the mission deck. Always works, even with a menu open. Once your account has more than one campaign it reads PLAY CAMPAIGN 2 and so on, naming the one you're playing. |
| STORY (the ••• button beside PLAY) | Opens STORY on the right, with four tabs: STORY (the flight crew and the story scenes you've reached), FIELD MANUAL (every tip card you've met), CAMPAIGNS and REPLAYS. A dot on the button means a new recording is waiting there. |
| The title | Tap the game's name to read the story, a paragraph at a time with pictures. Tap to move on; drag to look back. |
| Menu list (left) | CHALLENGE, GOALS, STATS, SHOP, LOADOUT and SETTINGS. A press opens that page on the right; pressing it again closes it. CHALLENGE is the Challenge and GOALS the daily and weekly goals: see below. |
| Goal reward cards (above PLAY) | One card for each goal you've met and each Challenge reward you've won and not claimed: what it's for, its reward, and CLAIM, which pays it into the campaign you're playing and lets the card rise away. Several stack, the next coming up as each is claimed. Hidden while a panel is open. |
| Recording card (above PLAY) | After a mission you recorded: the mission, how it ended and how long it ran, with three icon buttons. Play watches it, save keeps it as a .snsdemo file (the share sheet on an iPhone), and the trash deletes it: it turns red with AGAIN, and a second press within three seconds deletes. |
| Credits chip | Your balance, with a silver coin. Read only. |
| Crate chip | Opens the hold: your spare lives, powerups and arsenal. |
| Pilot chip | Your pilot name, with a line under it saying how you're signed in and whether this device's progress has reached your account: GOOGLE · NAME · SAVED, or GUEST · TAP TO SIGN IN. Press it to open the PILOT panel: rename yourself (up to 15 characters), sign in or out, sync now, add or remove sign-in methods (one Google, one Discord and one email login can open the same account), sign out your other devices, or delete your account. See Signing out & other devices. |
| ACE MODE badge | Appears beside your pilot name once you've won a mission with no primary gun, with the count under it. Press it to list those missions. See Ace Mode. |
| Energy bars (top right) | ZENITH CRYSTAL ENERGY over CORP. CRYSTAL ENERGY: the race both sides are running. Hidden until someone has banked any. They run up after a won mission. |
| MISSION CAP | Under PLAY: how far the campaign currently goes, mission 60. |
| Build stamp | The copyright, version and build date, bottom left under the credits chip: © 2026 INTERAXIS · v1.0.0 · 2026-11-02 23:51, the build time shown on your own clock. Useful when reporting a problem. When a newer version is live, it reads UPDATE READY · TAP TO RESTART, throwing a glowing amber ripple out every couple of seconds: tap it and the screen dims with a loading ring while the new version loads. With a keyboard or gamepad, step down to it from PLAY or the hold chip. |
Using the panels
- A press acts when you lift your finger, not when it lands. Move more than a few pixels up or down first and it becomes a scroll instead, so you can drag a long page from anywhere on it.
- Scroll with the mouse wheel or by dragging. A slider or the hull payment groove moves as soon as you take hold of its knob. Anywhere else on one, a drag scrolls the page and a tap sets it where you tapped.
- A press on the poster itself closes the panel, and PLAY still works with a panel open.
Menus with a keyboard or gamepad
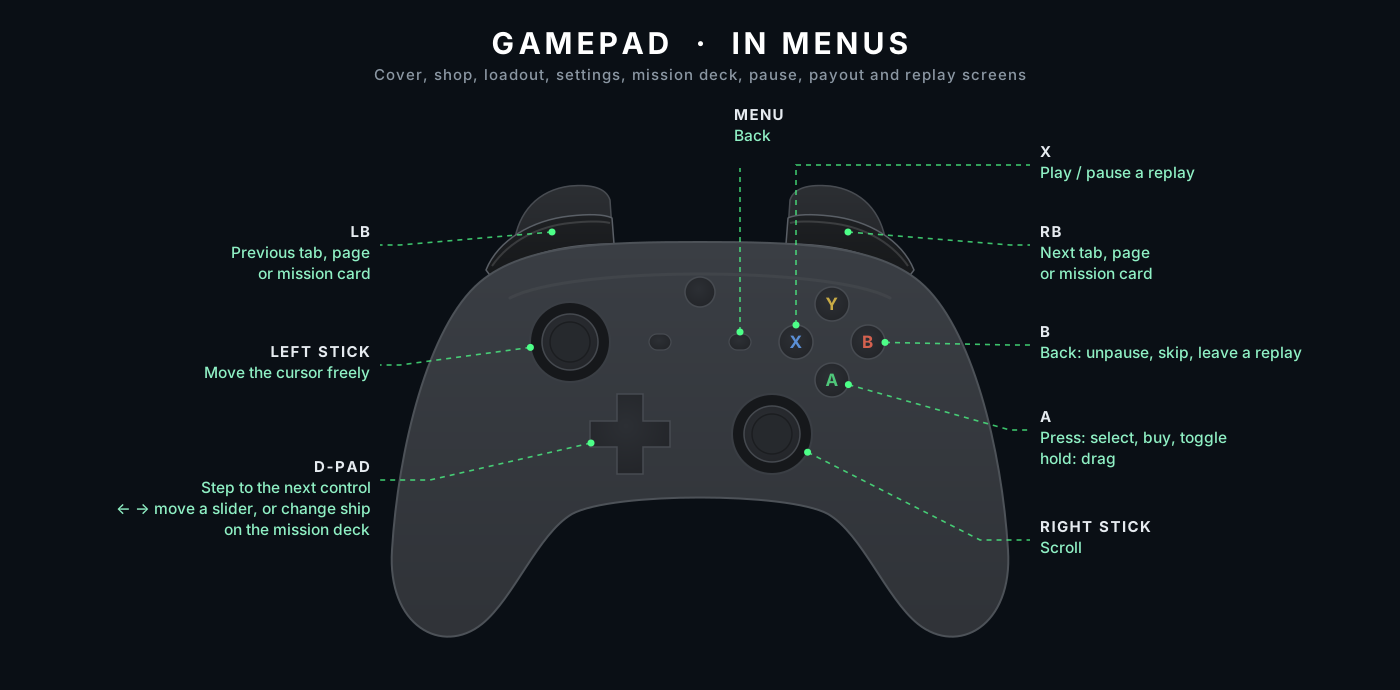
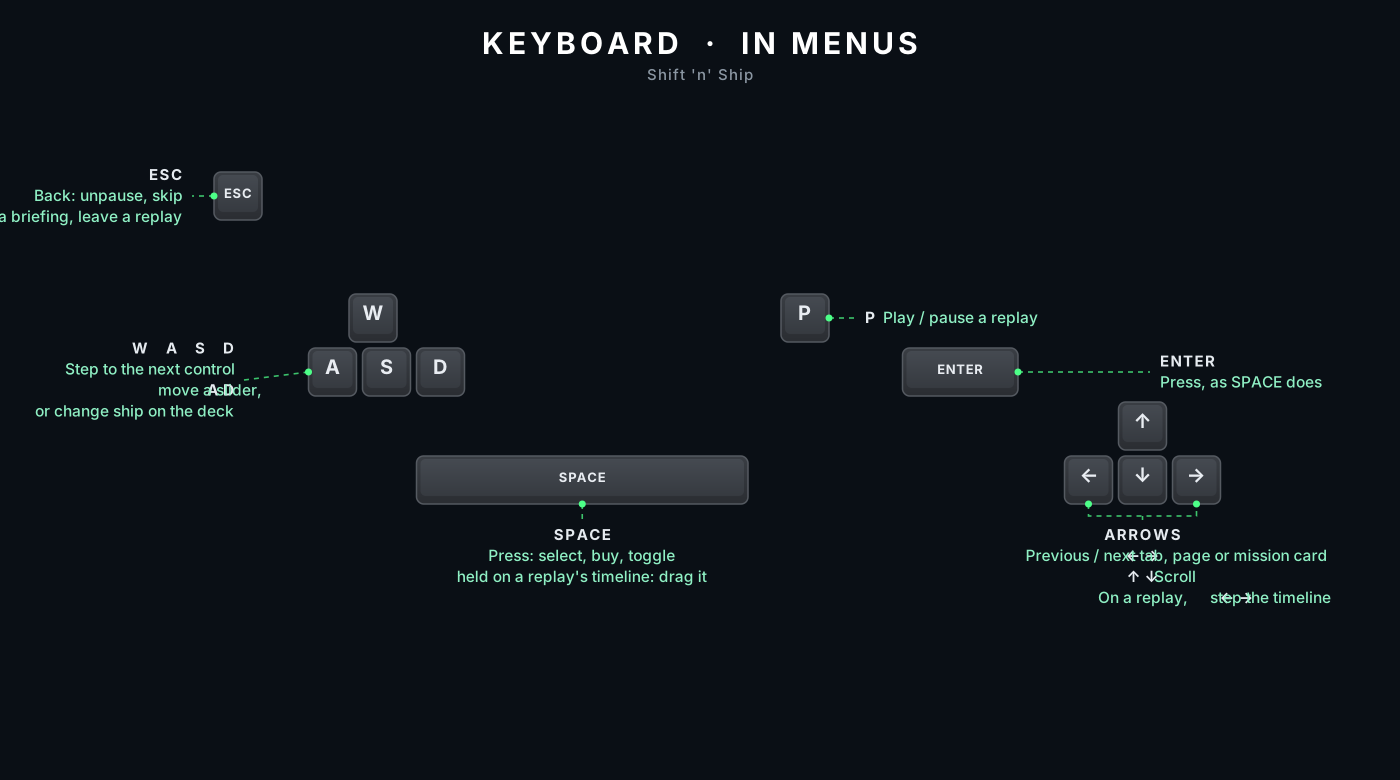
Every menu can be worked without a mouse: the cover, the shop, the loadout, settings, the mission deck, the payout screen, the pause screen and the screen after a wreck. A cursor steps between the controls on screen.
| Keyboard | Gamepad | What it does |
|---|---|---|
| W A S D | D-pad | Step to the next control in that direction. Inside a page like settings, up and down go one row at a time. Left and right move a slider, and on the mission deck or the respawn screen change ship. |
| — | Left stick | Move the cursor freely |
| ← → | LB / RB | Previous or next tab, then on to the previous or next page. On the mission deck, the previous or next card. On a replay, step the timeline. |
| ↑ ↓ | Right stick | Scroll |
| Space or Enter | A | Press: buy, play, check or uncheck a switch. On a gamepad, hold A to drag. On a keyboard it works once W A S D has brought the cursor up. |
| P | X | Play or pause a replay |
| Esc | B or Start | Back: unpause, skip a briefing, leave a replay |
The cursor lights up a big button it is on (PLAY, CONTINUE, RESPAWN, CLAIM, the hangar ring) the way a finger holding it does, puts a box round chips, tabs, switches and sliders, and underlines a line of text you can press, such as UPDATE READY. When a card or window opens (a tip, an info card, sign-in), the cursor moves onto it and stays there until it closes, then goes back where it was. Moving the mouse or touching the screen hides the cursor. In a mission every key works as it always has; see Flying & firing.
STORY
The small square button with three dots, just right of PLAY, opens a page with three tabs: STORY, FIELD MANUAL and CAMPAIGNS. A lit dot on a tab, and on the button beside PLAY, means something new is on it, and the page opens on that tab; otherwise it reopens on the tab you last read.
On the STORY tab, a PROLOGUE button on the page's title line opens the story from before mission 1, the same one tapping the game's name opens.
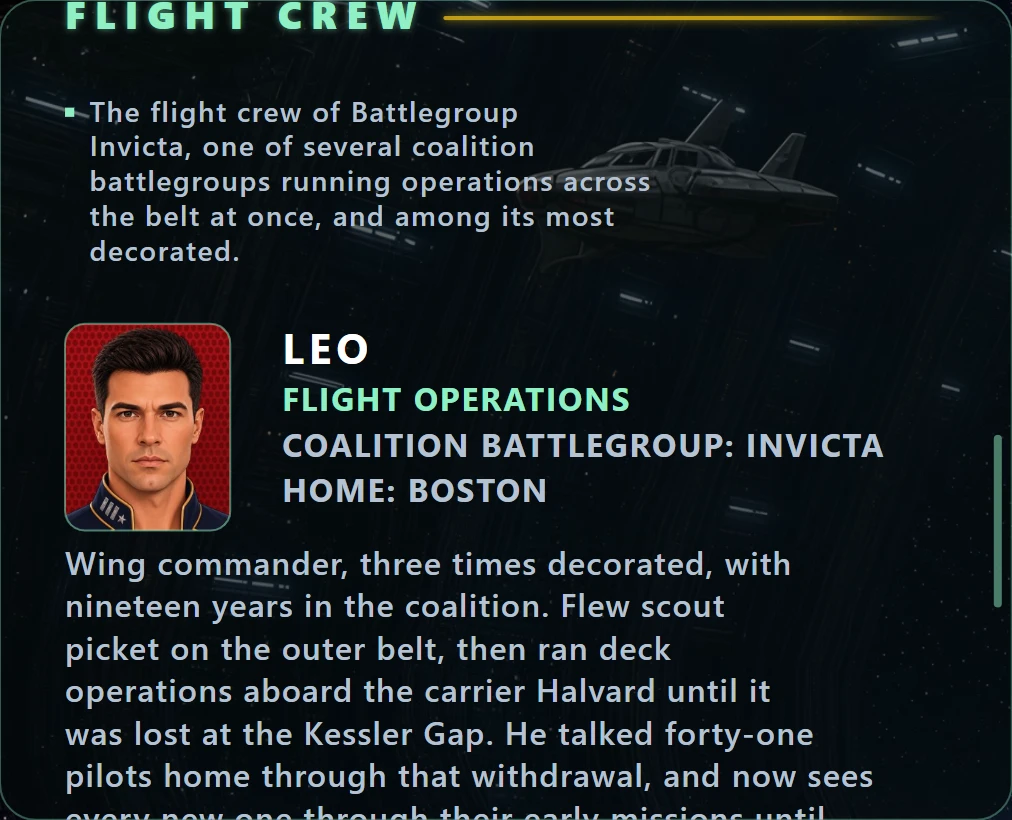
FLIGHT CREW introduces the voices on the radio, Leo and Nikki of Battlegroup Invicta, with their photographs, ranks, home towns and service. Nikki's card appears once you reach mission 36, where you meet her; until you've scrolled down to it, it glows and the button beside PLAY carries a lit dot. See the radio in the Field Manual.
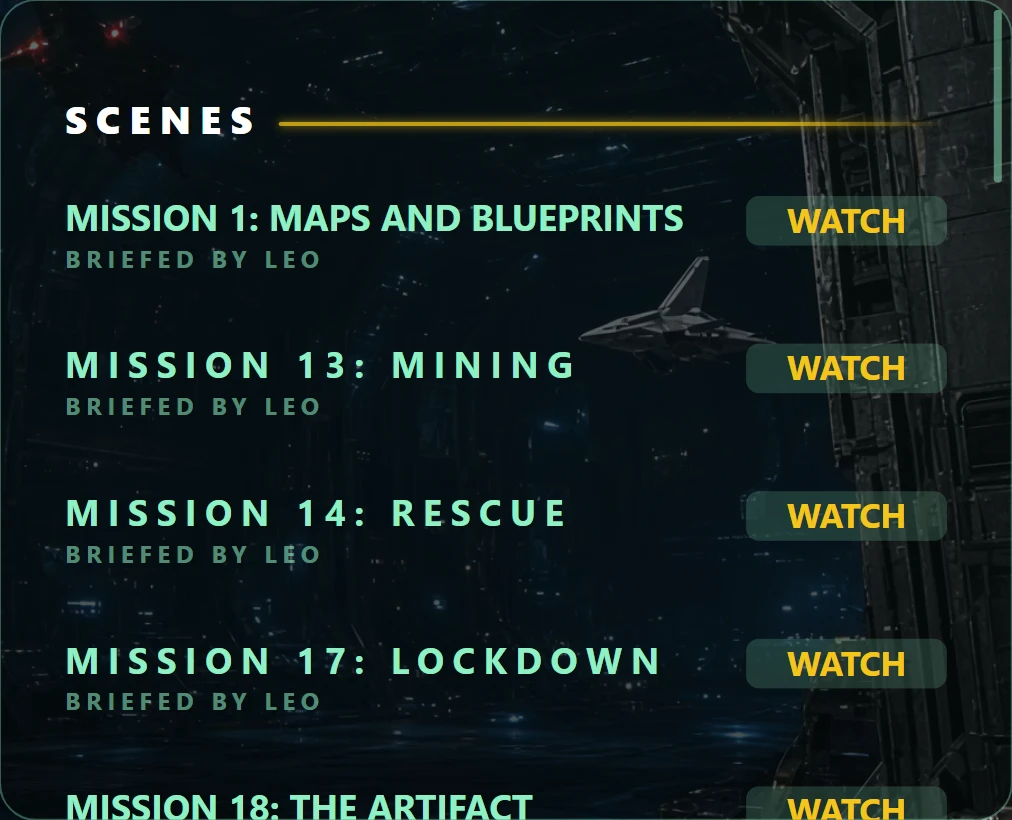
Under each crew member are the scenes they give: every radio briefing whose mission the campaign has
reached, listed as MISSION 13: MINING, each with a WATCH button. Briefings before
mission 36 are Leo's and the rest are Nikki's. Once you've won the last mission, the closing scene is listed
under Nikki too, as MISSION 60: VICTORY. A scene you haven't reached isn't listed. Watching one
changes nothing in your campaign: SKIP or CONTINUE brings you back to the same page.
The FIELD MANUAL tab lists every tip card you've met, each with its picture and the wording for your device and controls, grouped under the mission it first came up on, with a count of how many you've found. Cards you haven't met aren't listed, so it never gives away what's coming. A card you haven't read there yet carries a lit dot.
CHALLENGE
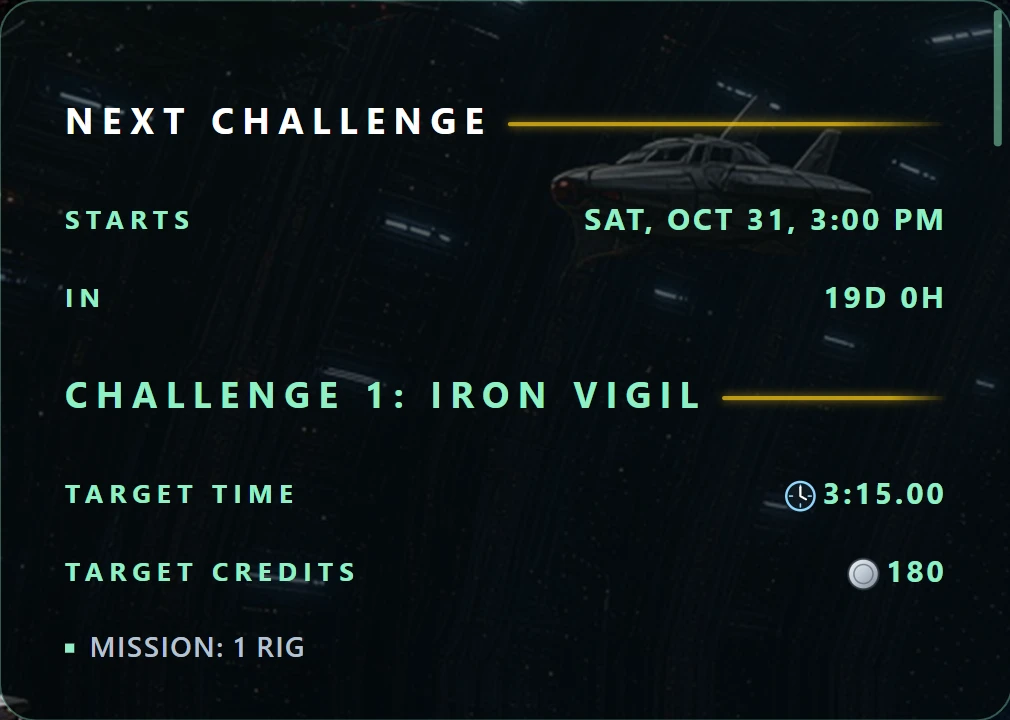
The Challenge: one mission everybody flies in the same ship, scored on time and credits. Between challenges the panel counts down to the next one and shows its targets and brief, with an icon beside every piece of kit, every hostile and every ally. While one is live it has PLAY CHALLENGE, your best run and the top 10. Further down are LAST CHALLENGE, with the top three's demos to watch, and your best run's demo to watch or save. It needs an internet connection. The full rules are in How it works.
GOALS
Three daily goals and three weekly goals, each with a reward, the same for everyone at the same stage of
the campaign. The DAILY and WEEKLY tabs each show one set, how long
until new goals arrive (daily goals change at midnight UTC, weekly ones on Monday at 00:00 UTC), and each
goal's progress, like 3 / 8, with its reward beside it: credits or a held item, with its icon.
A dot on the GOALS row means a reward is waiting.
- Goals are things like DESTROY 30 HOSTILES, RECOVER 6 MAPS OR BLUEPRINTS, MINE 9 TALVORITE IN ONE MISSION, RESCUE 10 SURVIVORS or WIN A MISSION WITHOUT LOSING A SHIP. Which set you get depends on the furthest mission you've reached: missions 1 to 12, 13 to 35, or 36 and on, so you're never asked for ore before you've met a lode.
- Only recent missions count. A goal counts missions within 10 of the furthest you've
reached, or within a quarter of the way back if that's further: at mission 60, missions 45 and up. Ore and
survivor goals look back 20, since lodes and rescue halls aren't on every mission. The page says which, as
COUNTS MISSION 45 AND UP, and on the mission deck the cards that count are green. - Only won missions count, a replay as well as a first win, but never a Challenge. Each mission counts once per goal, by its best run, so replaying one easy mission can't finish a running total. A goal that says IN ONE MISSION needs it all in a single run.
- Rewards: 25 to 125 credits for a daily goal and 100 to 225 for a weekly one, or a held item instead. Harder goals pay more, and pay an item, and a rarer one, more often.
- Goals belong to your account, not to one campaign: wins in any of your campaigns, on any of your devices, count toward the same goals.
- Claim a met goal with CLAIM, here or on its card above PLAY. A met reward never expires: one from a set that has closed waits under TO CLAIM. The reward goes into the campaign you're playing when you claim it, and each is paid once per account: claimed in one campaign, it reads ALREADY CLAIMED IN CAMPAIGN 2 (say) in the others. To pay a reward into a particular campaign, switch to it on the CAMPAIGNS tab first.
- Offline, goals still count, against the goals your game last downloaded (up to a week ahead). Rewards are paid once you're back online, when the button reads CLAIM again rather than OFFLINE. Until the game has downloaded any goals, the page says GOALS NEED AN INTERNET CONNECTION.
02 Campaigns, devices & tabs
Signed in, your account can hold up to three campaigns, each with its own mission, credits, hangar, upgrades, hold and record. Your settings are shared by all of them. As a guest you have the one campaign saved in the browser.
The CAMPAIGNS tab
The third tab on the page the ••• button beside PLAY opens. It lists each campaign on your
account: its mission (or 61 TBA once you've won the last one), its credits, the marks for its
ships, guns, special weapons, accessories and hold, and when it was LAST MODIFIED, in your own
time zone.
- SELECT switches to that campaign. The one you're leaving is synced first. If it can't reach the server, the tab warns that its unsynced progress would be lost, and the button becomes SWITCH ANYWAY.
- NEW CAMPAIGN starts one at mission 1, while you have fewer than three.
- DELETE asks twice (AGAIN) and can't delete the campaign you're playing. A deleted campaign's statistics stay on your account and still count under STATS, ALL CAMPAIGNS.
A device that was playing a campaign you deleted on another device moves to your most recently played campaign the next time it's on the cover (or starts a new one if none is left), and a CAMPAIGN DELETED window tells you. Any progress it hadn't synced is lost; it can never bring the deleted campaign back or write over another one.
The REPLAYS tab
The fourth tab on the ••• page, with every way to watch a run:
- OPEN A DEMO FILE plays any
.snsdemofile, a mission or a Challenge run, yours or one somebody sent you. - YOUR RECORDINGS: the last five missions you recorded, each with its mission, how it ended (WON, LOST, LEFT or 60 MIN), its length and when you flew it, and the same three icon buttons as the card on the cover: play, save, and a trash that asks twice.
- CHALLENGE: your best run on the current Challenge, to watch or save.
Goals and rewards with several campaigns
Goals are your account's, so wins in any campaign count toward them. A goal reward or a Challenge reward is paid once per account, into whichever campaign you're playing when you press CLAIM. To give a reward to a particular campaign, select it on the CAMPAIGNS tab and claim it there. In your other campaigns the card then reads ALREADY CLAIMED IN CAMPAIGN 1 (or whichever). A reward claimed into a campaign that's later deleted goes with it, and can't be claimed again.
Signing out & other devices
- SIGN OUT syncs your campaign first, then clears this device for whoever plays next: the save, kept demos and tips seen go, while your audio, graphics, gameplay and control settings stay. If the save can't reach your account the button becomes SIGN OUT ANYWAY, and a second press signs out and loses what hadn't synced.
- SIGN OUT OTHER DEVICES, in the pilot panel, is for when you've forgotten to sign out somewhere: it ends every other device's sign-in so no one else can play on your account. It asks you to confirm it's you first and says how many devices it signed out. Each of those devices is cleared, without syncing, the next time it's opened. If you sign in with an email, change your password if someone else may know it.
- PLAYED ON ANOTHER DEVICE: if another signed-in device has played the same campaign in the last few minutes, the cover tells you once (it can take a minute or two to notice). Progress on one can overwrite the other, so play a campaign on one device at a time. If it isn't you, the window's PILOT PANEL button takes you to SIGN OUT OTHER DEVICES.
More than one tab
Only one tab or window of a browser plays at a time. Open the game in a second tab and the first one saves what it has, stops and shows OPEN IN ANOTHER TAB; press USE HERE to bring the game back to that tab, picking up from where the other one left off.
03 Stats & the hold
STATS
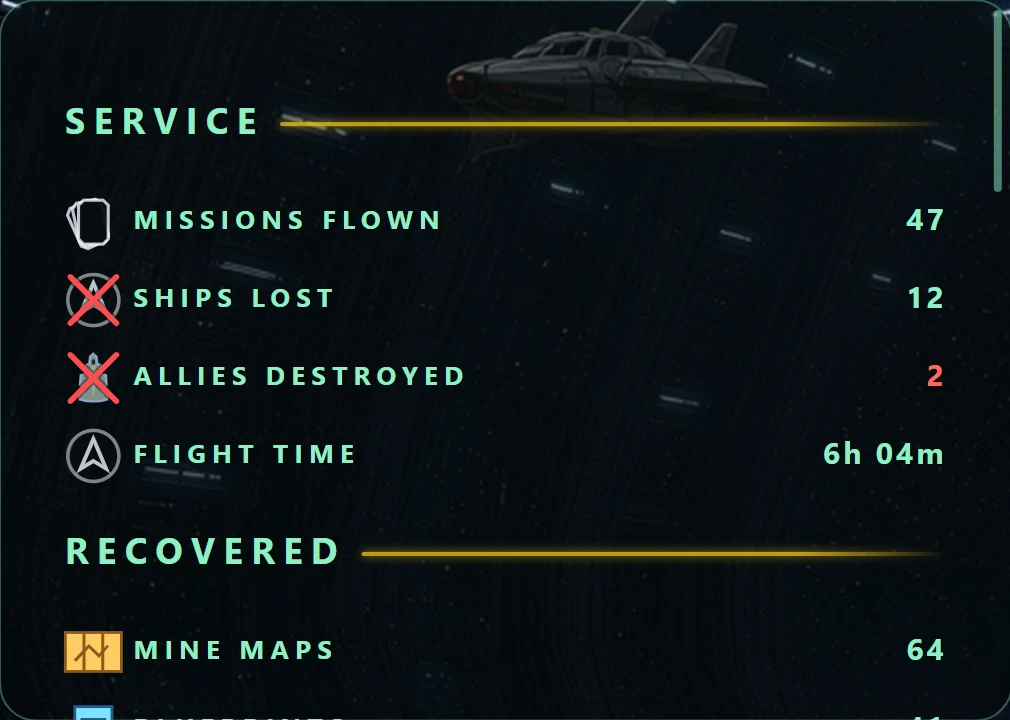
Your record, read straight from the save. Each row has a picture of what it counts. Once you have more than one campaign, two tabs appear: THIS CAMPAIGN and ALL CAMPAIGNS, which adds up every campaign on your account, including ones you've deleted.
- SERVICE: missions flown, ships lost, allies destroyed (in red, and best kept at zero), total flight time, including missions you walk out of early and time flown in Challenges.
- RECOVERED: mine maps, blueprints, survivors taken off and survivors lost.
- ORE: voskaryn, velarite, dravithe and talvorite brought home, zeros included.
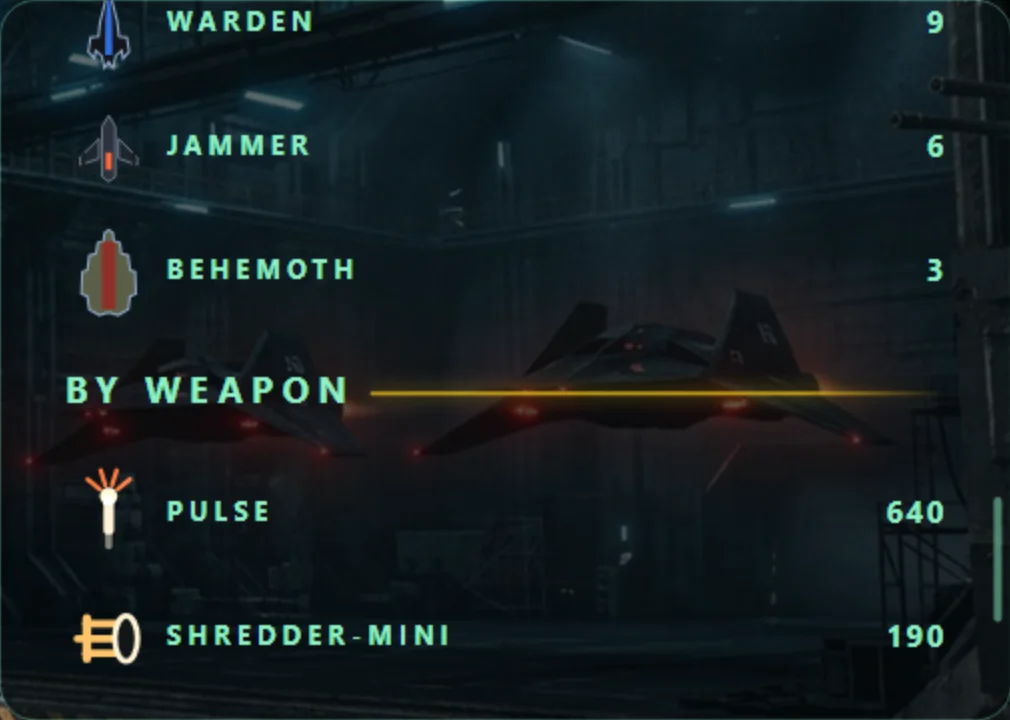
- DESTROYED: ALL TARGETS, then one row for each kind of thing you've destroyed, commonest first, each with its silhouette. Only what you've actually destroyed is listed.
- BY WEAPON: the same kills by the weapon that made them, including MONITOR for kills made flying one and RAMMING for kills made by flying into them.
- CHALLENGES: once you've flown a Challenge or reached a podium, CHALLENGE TIME (the part of your flight time spent in Challenges), then your podium badge and your 1st, 2nd and 3rd places. Nothing else from a Challenge run reaches your record.
Only Corp kills you earned count. Allies never appear, and a replayed mission adds nothing but flight time.
The hold
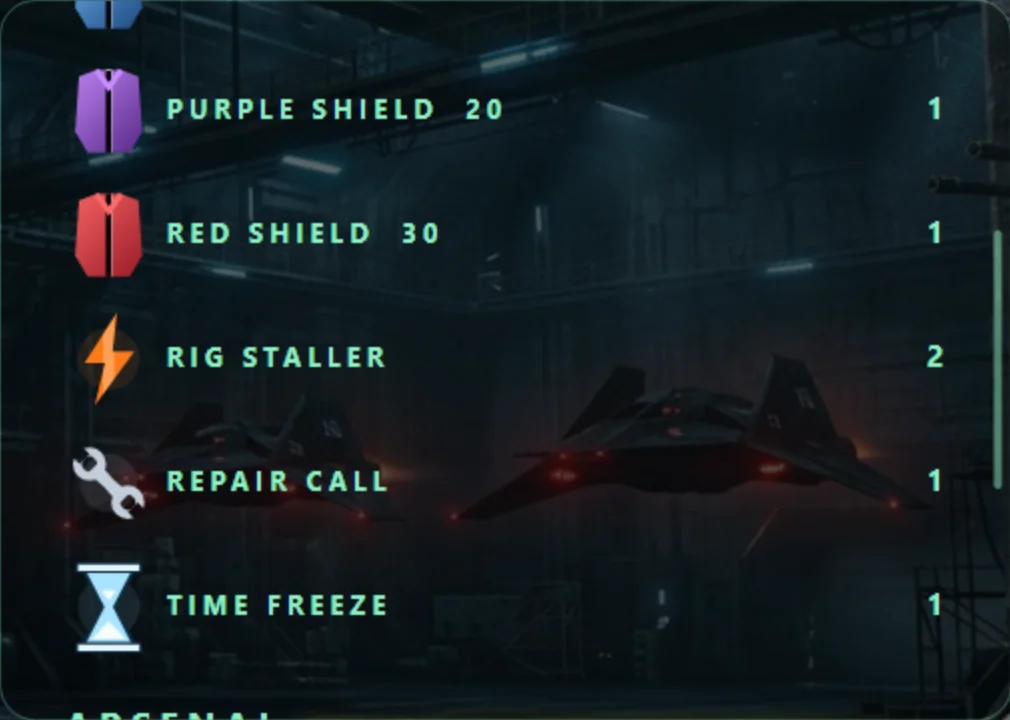
Opened from the crate beside your credits. INVENTORY lists your spare LIVES, then two shelves: POWERUPS (shields and the other powerups) and ARSENAL (weapons used up by count). Each row shows the item's mark and how many you hold, and an i after the name opens a short note on what it does. It's read only: items are used from the discs on the HUD, see Item & weapon buttons. What each item does is in the Field Manual's Powerups & arsenal.
04 Shop: hangar
The SHOP has four tabs across the top: HANGAR, WEAPONS, EXTRAS and ALLY. Changing tab takes you back to the top of the page.
Every button that spends credits needs two presses within about a second and a half. The first turns it amber and shows AGAIN; the second buys. A press anywhere else, or waiting, cancels. Nothing is ever sold back.
Ship cards
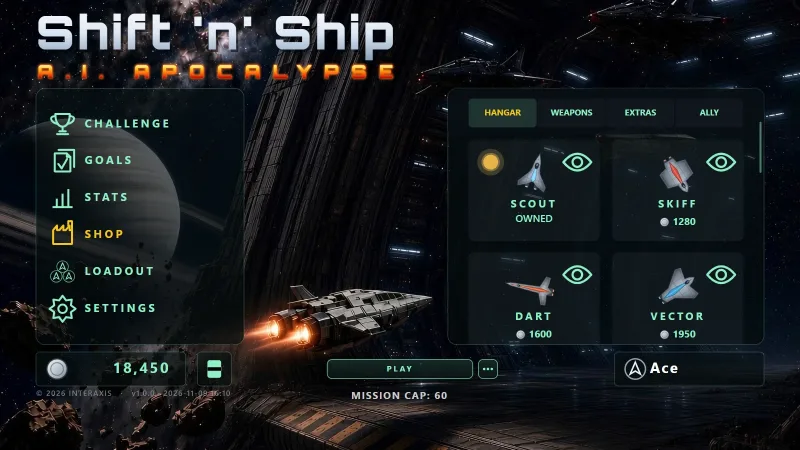
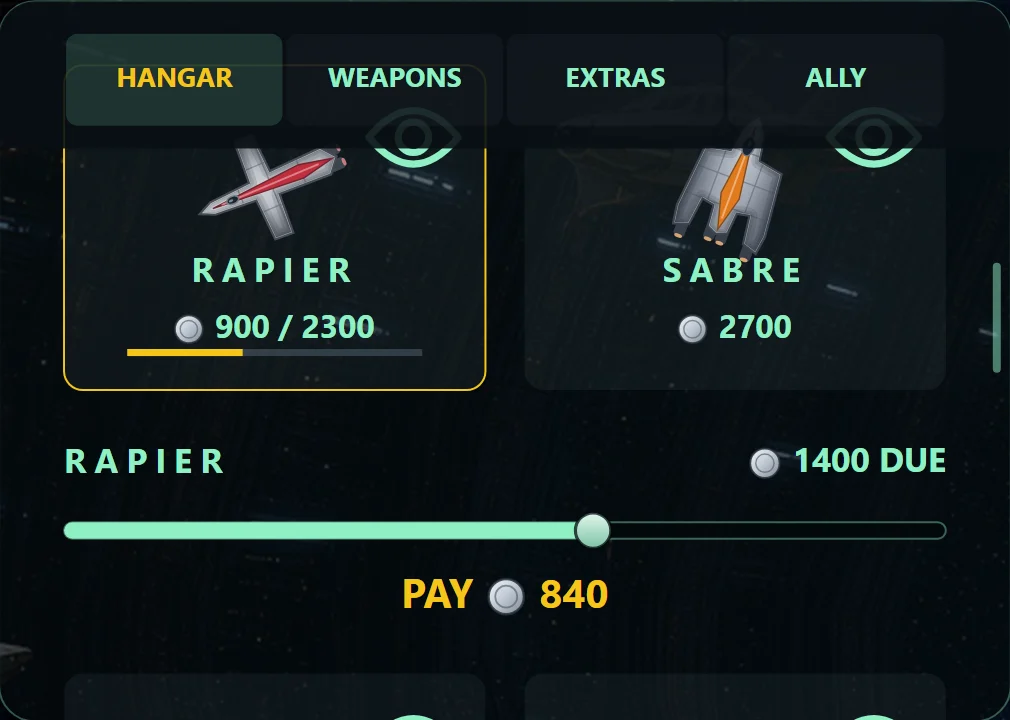
Sixteen hulls, two to a row, cheapest first. Each card shows:
- The ship turning slowly, its name, and OWNED, what you've paid toward it, or its price.
- A role orb top left on ships you own: hollow white for owned, gold for your PRIMARY, green for a SECONDARY. Roles are set on the LOADOUT page.
- An eye top right, which opens that ship's own pages (below).
Tap a card to open what you can spend on it underneath. Tapping a card never changes the ship you fly.
Buying a hull
- An unowned ship shows how much is still due and a payment groove. Drag it to choose how much to put down now; the far right end pays everything you owe, or your whole balance if that's less.
- Press PAY (twice) to pay that amount. Money put toward a ship stays on it, and the ship is yours once it's paid off.
Upgrading a hull
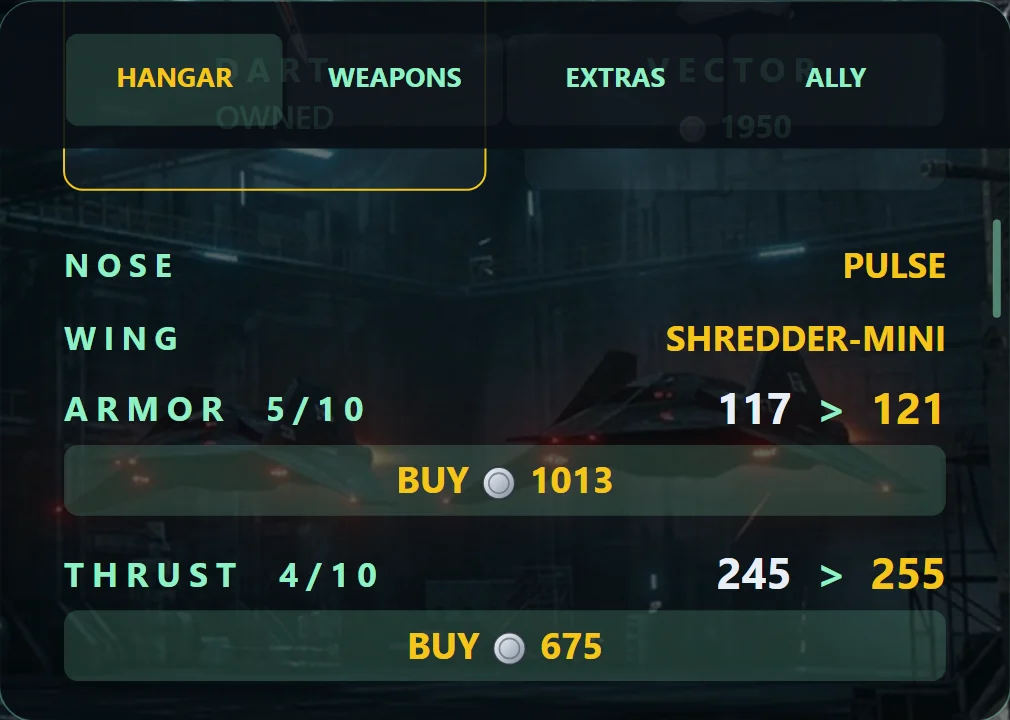
An owned ship shows what's on its mounts, then three upgrades, each as now > next with a BUY
price:
| Row | What it improves |
|---|---|
| ARMOR | The hull's armor, up to 35% more once bought out. |
| THRUST | Acceleration in every direction and braking, up to half again bought out: the same engines do both. It also raises the hull's top speed, up to 20%. |
| STEER | How fast the nose comes round, shown in degrees a second, up to 60% faster bought out. |
- Every hull has ten steps on each upgrade, and each step is a tenth of the full gain.
- The price rises by half each step: 200, 300, 450, 675, 1,013 and so on.
- Upgrades belong to the hull you bought them for.
| Ship | Price | Armor | Top speed | Turn (°/s) | Thrust | Mounts | Special weapons | Accessories |
|---|---|---|---|---|---|---|---|---|
 Scout | free | 120 → 162 | 165 → 198 | 178 → 284 | 185 → 278 | nose, wing | 2 | 3 |
 Skiff | 1,280 | 131 → 177 | 160 → 192 | 174 → 279 | 180 → 271 | nose, wing | 2 | 3 |
 Dart | 1,600 | 103 → 139 | 185 → 222 | 208 → 332 | 213 → 319 | nose, wing | 2 | 3 |
 Vector | 1,950 | 132 → 178 | 162 → 194 | 183 → 293 | 182 → 273 | nose, wing | 2 | 3 |
 Rapier | 2,300 | 119 → 161 | 175 → 210 | 199 → 318 | 199 → 298 | nose, wing | 2 | 3 |
 Sabre | 2,700 | 138 → 186 | 159 → 191 | 183 → 293 | 179 → 269 | nose, wing | 2 | 4 |
 Cutlass | 3,100 | 146 → 197 | 153 → 184 | 178 → 284 | 174 → 261 | nose, wing | 2 | 4 |
 Glaive | 3,550 | 147 → 198 | 154 → 185 | 181 → 290 | 175 → 262 | nose, wing | 2 | 3 |
 Halberd | 4,000 | 151 → 204 | 152 → 182 | 179 → 287 | 173 → 259 | nose, 2 wings | 2 | 3 |
 Pike | 4,500 | 139 → 188 | 162 → 194 | 194 → 310 | 182 → 273 | nose, 2 wings | 2 | 4 |
 Falchion | 5,000 | 154 → 208 | 151 → 181 | 181 → 290 | 172 → 258 | nose, 2 wings | 2 | 4 |
 Claymore | 5,550 | 164 → 221 | 143 → 172 | 174 → 279 | 165 → 247 | nose, 2 wings | 3 | 3 |
 Bastion | 6,100 | 162 → 219 | 146 → 175 | 178 → 284 | 167 → 251 | nose, 2 wings | 3 | 3 |
 Aegis | 6,700 | 171 → 231 | 139 → 167 | 171 → 273 | 161 → 241 | nose, 2 wings | 3 | 3 |
 Titan | 7,350 | 172 → 232 | 139 → 167 | 172 → 276 | 161 → 241 | nose, 2 wings | 3 | 3 |
 Colossus | 8,000 | 177 → 239 | 135 → 162 | 169 → 270 | 157 → 236 | nose, 2 wings | 3 | 4 |
Armor, top speed, turn and thrust are shown as stock → fully upgraded. Thrust is how hard the hull pushes and brakes. Size decides most of it: small hulls are quick and light and big ones slow and tough, and within a size the dearer hull is a little tougher and turns a little better. Most hulls take either the cloak or the Amplifier: the dart, rapier and glaive take the cloak; the skiff, vector, halberd, claymore, bastion, aegis and titan take the Amplifier; the scout, sabre, cutlass, pike, falchion and colossus take both. The last five of those carry four accessories, so choosing both costs a place rather than the whole shelf.
Laying mines and turrets, and recoil
Putting down a proxy mine, shard mine or turret holds your ship for a moment. On the lightest hulls it stops and can only turn. Heavier hulls are held for less time and keep part of their speed. The heaviest just drops one and flies on. A turret takes twice as long as a mine. The Shredder-Mini, Viper Gatling, Basilisk, Mamba and shotgun shove every hull back as they fire: light hulls feel it most, heavy ones least. A shotgun shell kicks hardest, and fired off one wingtip it visibly knocks the nose about 11 degrees toward that side, easing back within about half a second. Heavier hulls are knocked less, and a two-stream hull firing both tips at once cancels out. The pulse, the twin and forge lasers, the conductor and the Zapshot throw nothing back.
| Ship | Laying a mine | Placing a turret | Recoil (scout = ×1) |
|---|---|---|---|
| Scout | 1.25s, stops | 2.5s, stops | ×1.00 |
| Skiff | 0.86s at 31% | 1.72s at 31% | ×0.54 |
| Dart | 1.25s, stops | 2.5s, stops | ×1.07 |
| Vector | 0.91s at 27% | 1.81s at 27% | ×0.58 |
| Rapier | 1.14s at 9% | 2.28s at 9% | ×0.81 |
| Sabre | 0.83s at 33% | 1.67s at 33% | ×0.53 |
| Cutlass | 0.67s at 46% | 1.35s at 46% | ×0.45 |
| Glaive | 0.7s at 44% | 1.4s at 44% | ×0.46 |
| Halberd | 0.63s at 50% | 1.26s at 50% | ×0.43 |
| Pike | 0.9s at 28% | 1.81s at 28% | ×0.57 |
| Falchion | 0.61s at 51% | 1.22s at 51% | ×0.42 |
| Claymore | 0.36s at 72% | 0.71s at 72% | ×0.34 |
| Bastion | 0.44s at 65% | 0.88s at 65% | ×0.36 |
| Aegis | 0.18s at 86% | 0.36s at 86% | ×0.30 |
| Titan | 0.16s at 87% | 0.32s at 87% | ×0.30 |
| Colossus | none | none | ×0.27 |
"At 31%" means the ship can still move at up to 31% of its top speed while it waits.
What each hull holds
Each hull has room for only so many of the weapons used by count. You fly with whichever is lower: what your QUANTITY dial allows, or what the hull holds. A dash means the hull can't carry that weapon at all.
| Ship | Proxy mines | Shard mines | Crawl bombs | Seekers | Rockets | Timed nades | Impact nades |
|---|---|---|---|---|---|---|---|
| Scout | 7 | — | 1 | 2 | 2 | 2 | 2 |
| Skiff | 7 | — | 2 | 2 | 2 | 2 | 2 |
| Dart | — | 5 | 2 | 2 | 2 | 2 | 2 |
| Vector | 8 | — | 2 | 2 | 3 | 3 | 2 |
| Rapier | — | 5 | 2 | 2 | 3 | 3 | 3 |
| Sabre | 9 | — | 2 | 2 | 3 | 3 | 3 |
| Cutlass | — | 6 | 3 | 2 | 3 | 3 | 3 |
| Glaive | — | 6 | 3 | 2 | 4 | 4 | 3 |
| Halberd | 11 | 5 | 3 | 3 | 4 | 4 | 3 |
| Pike | 10 | 5 | 2 | 2 | 4 | 4 | 3 |
| Falchion | 12 | 6 | 3 | 3 | 4 | 4 | 3 |
| Claymore | 13 | 7 | 3 | 3 | 4 | 4 | 4 |
| Bastion | 13 | 7 | 3 | 3 | 3 | 4 | 3 |
| Aegis | 13 | 8 | 3 | 3 | 5 | 5 | 4 |
| Titan | 13 | 8 | 3 | 3 | 5 | 5 | 4 |
| Colossus | 13 | 8 | 3 | 3 | 5 | 5 | 4 |
A ship's own pages (the eye)
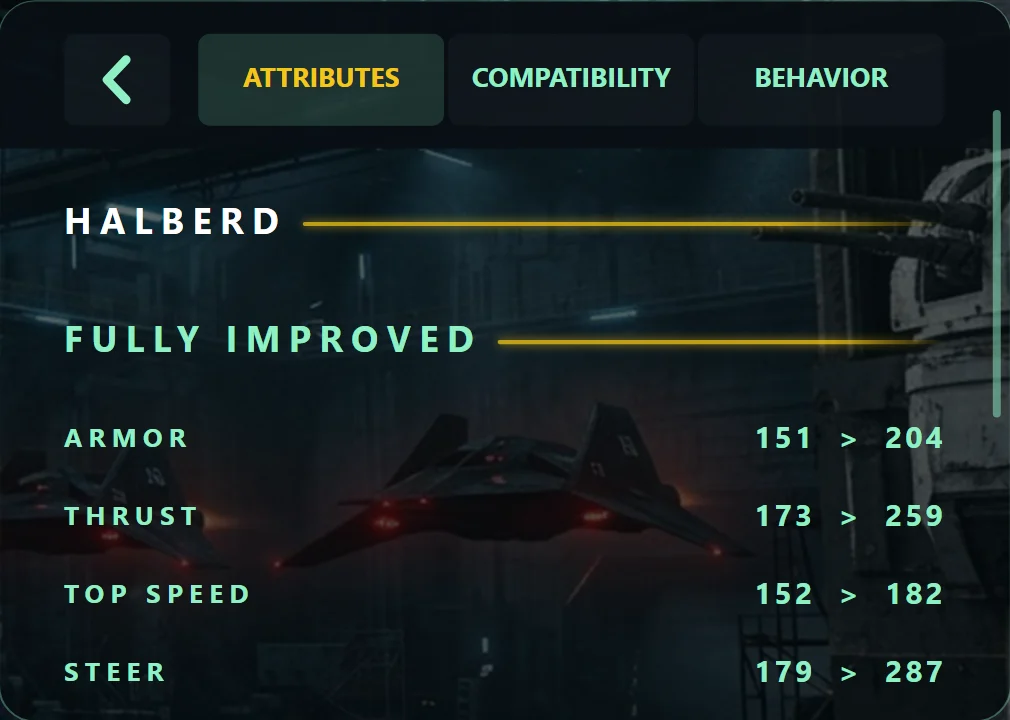
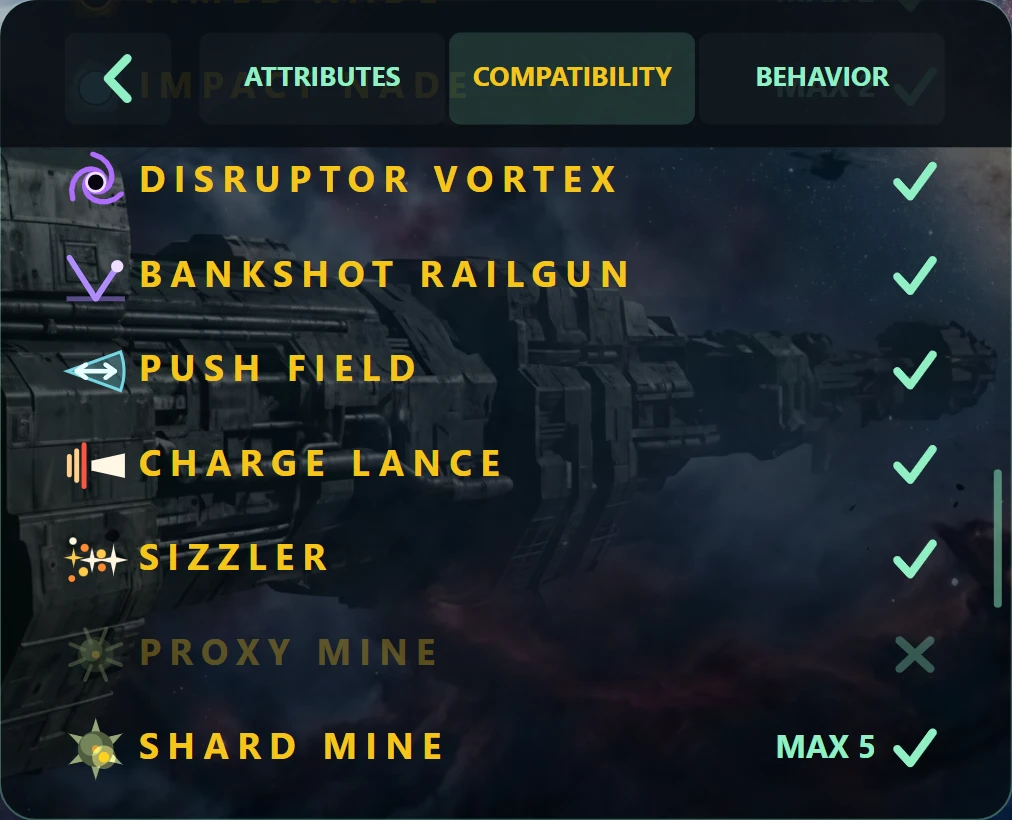
The eye on a card opens three tabs about that ship, whether or not you own it. A back arrow returns you to the hangar exactly where you were.
- ATTRIBUTES: ARMOR, THRUST, TOP SPEED and STEER as
start > fully upgraded, then the hull's streams, mounts, how many light and heavy weapons it takes, special-weapon allowance and accessory count. A two-stream hull reads2 — 150% DAMAGE: each round carries both streams, at 1.5 times a one-stream round's damage, and is drawn thicker (see the manual). Every hull has the same ten upgrade steps, so the page doesn't list them. - COMPATIBILITY: every weapon, special weapon and accessory, and whether this hull can carry it. Weapons used by count show the most this hull holds.
- BEHAVIOR: how long this hull is held when it lays a mine or places a turret, and which of the guns it can carry kick it back, and how hard.
05 Shop: weapons & extras
These two tabs are a catalogue: what exists, what it costs and whether you own it. A primary gun you buy is fitted straight away to every ship you own with a free mount for it. Anything else about where a weapon goes is decided on the LOADOUT page.
- Not owned: its price and a BUY button. If no ship you own can carry it, the button is replaced by a blue NO SHIP COMPATIBILITY and it can't be bought.
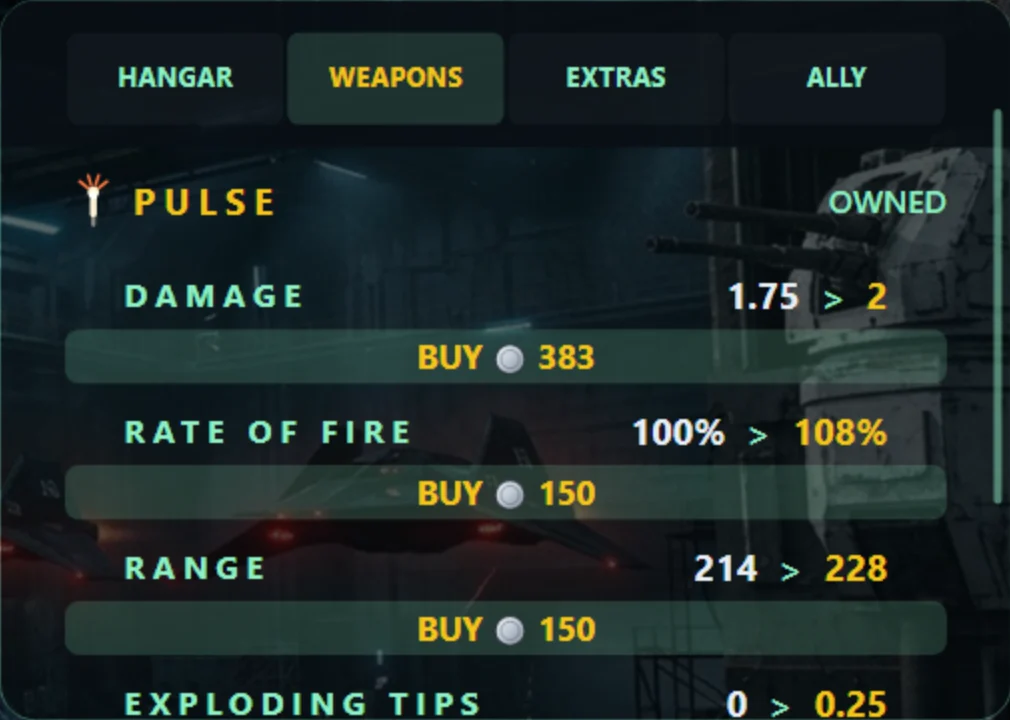
- Owned: tap the row to open its upgrade dials. Each shows
now > nextwith a price, or MAX at its ceiling. A dial is bought once and applies to that weapon on every ship. - Most dials share one price ladder that starts at 150 and climbs gently. Quantity dials and a few others have steeper ladders of their own. The Pulse's DAMAGE and EXPLODING TIPS, and the DAMAGE of the Viper, Zapshot, Shotgun, Basilisk and Mamba, are ten steps each, every step a quarter dearer than the last: about 5,000 to 7,500 credits for a full set.
- A QUANTITY step can't be bought past what the roomiest hull you own can hold. It stays faded, and says HANGAR LIMIT in blue when you have the money. See what each hull holds.
- WEAPONS has two shelves: LIGHT WEAPONS (the Pulse, the Shredder-Mini, the Viper Gatling, the Zapshot and the Shotgun) and HEAVY WEAPONS (the Basilisk, the Mamba, the twin and forge lasers and the Conductor). Every ship takes two light guns; ships under 3,100 credits take one heavy gun and the Cutlass and up take two. See LOADOUT.
- EXTRAS has two shelves: SPECIAL WEAPONS, which count against a hull's allowance, and ACCESSORIES, which don't.
- An i after a weapon's or ally purchase's name opens a short note on what it does.
WEAPONS: the primary guns
| Gun | Dials (start → fully upgraded) |
|---|---|
 Pulseissued free | DAMAGE 1 → 2 · RATE OF FIRE 100% → 180% · RANGE 214 → 1,100 · ROUND SPEED 178 → 350 (rounds arrive sooner; it doesn't add range) · EXPLODING TIPS 0 → 1.5 (each round bursts where it stops, splashing nearby Corp ships but never you) |
 Shredder-Mini450 credits | DAMAGE 0.3 → 0.8 · RATE OF FIRE 120% → 220% · RANGE 200 → 900 · ACCURACY 45% → 85% (damage kept at full range, and a tighter spray) · COOLDOWN 2s → 1s |
 Viper Gatling1,350 credits | DAMAGE 0.14 → 0.44 a round, four rounds a pull · RATE OF FIRE 100% → 180% · RANGE 200 → 650 · COOLDOWN 3s → 1.5s. No accuracy dial: rounds keep full damage to the end of their range, each barrel inside its own six-degree spread |
 Zapshot900 credits | DAMAGE PER BOLT 3 → 6 a second per trunk · DURATION 1.5s → 3s · COOLDOWN 7s → 4s · SLOW 40% → 70% · RANGE 180 → 280 |
 Shotgun800 credits | DAMAGE PER PELLET 2.4 → 4.4, eight pellets a shell, two shells half a second apart · RANGE 140 → 240 · COOLDOWN 4s → 2s |
 Basilisk Heavy Gatling2,600 credits, large hulls | DAMAGE 1 → 2 a round · RATE OF FIRE 100% → 150% · RANGE 280 → 700 · SPREAD 8° → 4° · COOLING 4s → 2s |
 Mamba Heavy Gatling2,000 credits, select hulls | DAMAGE 0.55 → 1.05 a round · RATE OF FIRE 100% → 150% · RANGE 250 → 600 · COOLING 4s → 2s. No spread dial: its cone is fixed at seven degrees |
 Twin Laser2,200 credits | DAMAGE 0.81 → 1.62 a bolt, two bolts a pull · RATE OF FIRE 50% → 100% · RANGE 700 → 1,200 · COOLDOWN 6.4s → 3.2s |
 Forge Laser2,600 credits | BASE DAMAGE 1 → 2 a bolt while it's white, two bolts a pull, each heat step 1.35 times the one before, up to 3.3 times at orange · RATE OF FIRE 35% → 70% · RANGE 700 → 1,200 · COOLDOWN 6s → 3.2s |
 Conductor2,800 credits, cutlass and up | DAMAGE 3 → 6: the arc's burn a second, dead ahead, and each bolt half that · RATE OF FIRE 50% → 100% · RANGE 400 → 800 · COOLDOWN 6s → 3.2s |
The Shredder-Mini has six seconds of fire, shown as a brass rail under your armor. Its rounds lose bite with range, but over their first 120 units they hit a quarter harder, so it pays to fly in close. Let go and it refills; the COOLDOWN dial is how long a full refill takes. Hold the trigger on an empty gun and it sputters short bursts as a little comes back.
The Viper Gatling works the same way, with its own green rail and six seconds of fire. It fires four barrels at once, for more damage a second than the Shredder, and pauses for 0.3 seconds after each second of fire. On the wings, two rounds leave each tip.
The Basilisk and the Mamba spin up from about a third of their rate to full over a second of holding, and run on heat instead: five seconds at full rate fills it, letting go cools it, and a full gun flashes red and locks until it is back down to 35%. The red is a warning, not damage to you. Only the five large hulls take the Basilisk, whose rounds cut breakable plating fast. The Mamba fits the Sabre, the Cutlass and every two-stream hull, and a round that kills a small ship carries on into the next. A ship carries one or the other, never both.
The twin laser fires for three seconds and then rests for its cooldown; what's left is kept when you let go. The shotgun waits for a target inside its own range before it fires on its own. The Zapshot's two lightning trunks burn whatever they touch and slow a small ship held in them for a while after contact, never longer than the weapon's own duration; heavier hulls are slowed less and capital ships not at all. It fires its two trunks on any hull, so it is not doubled by a second stream.
The forge laser fires five-second bursts. Every pull that lands on anything hostile heats it a step, from white through pale yellow-green, yellow and orange-yellow to orange, and its bolts grow longer and hit harder with each. With nothing hit it cools a step at a time, each color holding a second longer than the one below: three seconds at pale yellow-green up to six at orange. Shooting walls doesn't heat it.
The conductor goes on the wings only, from the cutlass up, and never on the same ship as
a Viper Gatling. Each pull fires four bolts, a pair off each wingtip: one straight down the nose and one
angled about 13 degrees out. Bolts go straight through every hostile they meet. Anything hostile inside
the 16-degree arc either side of the nose, where bolts are flying, takes a three-second burn as a spark
jumps to it from the nearest bolt; the burn is strongest dead ahead and fades toward the arc's edge. It
fires the same on a two-stream hull, and the loadout says (1-STREAM) beside it there, as it
does for the Zapshot.
A wing mount fires as much as the nose. Every gun puts out the same rounds from a wing as from the nose. The difference is where they go: two lines out at the wingtips cover more, but put fewer rounds on one small target in front of you.
EXTRAS: special weapons
QUANTITY is how many charges you carry. Each charge recharges on its own after you use it, and the number beside the weapon's HUD button is how many are ready.
| Weapon | What it does | Dials |
|---|---|---|
 Seekers900 | Homing missiles: your marked target first, then the nearest Corp ship. Flares can decoy them. | DAMAGE 4 → 10, COOLDOWN 24s → 18s, QUANTITY 1 → 3, SPEED 210 → 280, RANGE 700 → 1,200, EFFECTIVENESS 45% → 75% (ignores Corp flares; its top rungs cost more than the rest) |
 Rockets900 | The same warhead flown straight. Flares don't affect them. | DAMAGE 4 → 10, COOLDOWN 17s → 11s, QUANTITY 1 → 5, SPEED, RANGE |
 Crawl bomb1,400 | A slow homing bomb that finds its own way round corners, into a rig and back out of one: your marked target first, then the nearest Corp ship. All its damage is in the blast, and it goes off only on its target, slipping past every other ship and gun and shoving loose junk aside. A lit outlet wears it down rather than setting it off. A ship it's after may shoot it down. | DAMAGE 12 → 24, ARMOR, COOLDOWN 24s → 18s, QUANTITY 1 → 3, SPEED, RANGE, GUIDANCE (how well it follows its route: an unbought bomb mostly flies the bearing) |
 Timed nade900 | Thrown, brakes to a stop, and goes off after four seconds. | DAMAGE 16 → 32, BLAST RADIUS, COOLDOWN 20s → 11s, QUANTITY 1 → 5 |
 Impact nade800 | Thrown the same way, goes off on first contact, with half the blast. | DAMAGE 10 → 20, BLAST RADIUS, COOLDOWN 20s → 13s, QUANTITY 1 → 4 |
 Disruptor vortex2,400 | Opens a hole that hauls rock, junk and canisters into it. The damage comes from the pileup. | RANGE, POWER, COOLDOWN 36s → 26s |
 Bankshot railgun2,200 | A slug that passes through what it hurts and banks off plating and rock. First press shows the aim path, second press fires. | DAMAGE 10 → 20, REBOUNDS 8 → 32, COOLDOWN 16s → 11s |
 Push field2,200 | A cone out of your nose that throws everything in it away from you, satellites and docks included. Nothing it throws leaves the mission area. No damage of its own. | RANGE 200 → 400, ARC 40° → 80°, FORCE, COOLDOWN 18s → 11s, DURATION 0 → 0.3s (how long it keeps pushing after the press, catching what flies in) |
 Charge lance2,800 | Hold to charge, release to fire a beam. While it's held on something, it pushes it along the beam: a drone is thrown, a heavy hull leaned on. Hold too long and it backfires into your hull. | DAMAGE 120 → 240, GRACE 1s → 2s (how long a full charge can be held), COOLDOWN 16s → 10s, BURN 0.4s → 4s (how long the beam lasts: the same damage, spread over longer) |
 Sizzler900 | Pours a pool of burning sparks behind you that fries Corp ships flying through, and slowly burns breakable plating it lies against. | SPRAY TIME 1.5s → 3s, DURATION 5s → 15s, COOLDOWN 20s → 12s |
 Proxy mine800 | Laid where you are; goes off when something comes near. | DAMAGE 50 → 75, BLAST RADIUS, QUANTITY 3 → 13 standing (laying past it fades your oldest), TRIGGER RANGE, COOLDOWN 15s → 5s |
 Shard mine950 | A proxy mine that drifts toward the nearest Corp ship and throws shrapnel when it goes off. A ship moving fast outruns it. Its lamp blinks yellow. | The proxy mine's five, with QUANTITY 2 → 8 and a little dearer, plus ATTRACTION: how far off it feels a ship, up to double. DAMAGE and BLAST RADIUS also throw its shrapnel further |
 Sticky bomb800 | Thrown a short way, sticks to what it touches. Press again to set it off. | DAMAGE 50 → 75, BLAST RADIUS, COOLDOWN 40s → 20s |
 Sentry turret1,600 | A laser turret you leave behind that fights on its own. Bolts to a wall if one is near, otherwise floats. | DAMAGE 2 → 4, ARMOR, RANGE (doubled in open space), QUANTITY 1 → 4 standing, BARRELS 1 → 2 |
 Bastion turret1,600 | The second turret: minigun bursts in a wide cone. Same family as the sentry. | Its own five dials, bought separately from the sentry's |
Turrets have no cooldown dial: there are twenty seconds between deployments, and the number on the button is how many more you may put down. Placing one holds your ship for a moment, longer on light hulls (see laying mines and turrets). Some hulls can't carry turrets; the scout and the skiff carry neither.
EXTRAS: accessories
| Accessory | What it does | Dials |
|---|---|---|
 Flares450 | Decoys dropped from your tail that can pull a Corp seeker off you. Any hull. | FLARE LIFE 5s → 20s, QUANTITY 2 → 8, EFFECTIVENESS 50% → 75%, COOLDOWN 15s → 10s |
 Cloak700 | Nothing hostile can see or target you while it's on. Firing anything drops it. Scout, dart, rapier, sabre, cutlass, glaive, pike, falchion and colossus. | DURATION 10s → 16s, COOLDOWN 20s → 16s (full refill) |
 Tracker600 | Numbered markers you drop on the chart, at least 100 units apart, and can pick back up. | MARKERS 1 → 5 |
 Booster1,200 | A hard shove along your nose to above your top speed, which then fades. One boost at a time. | QUANTITY 1 → 3, BOOST SPEED 35% → 60% over top speed, COOLDOWN 20s → 12s |
 Magnetico1,300 | Switch it on and it pulls loose junk and canisters within 50 units onto your hull, up to four, taking a canister off its wall. Use it again to throw them in a fan ahead, or hold that press for half a second to throw them all around; then it waits two seconds. For 5 seconds after a throw, while they glow red, anything they destroy counts as your kill, and a thrown canister goes off as your blast. Held pieces go through a wormhole with you, and are dropped if you lose your ship. Any hull. | THROW SPEED 240 → 360 |
 Amplifier1,400 | Switch it on and, while it runs, it soaks up Corp energy rounds within its range that are going to miss you, beams passing close, and Corp blasts that go off just short of you (a near miss, not a direct hit; each is worth one and a half rounds). Eight rounds fill it, and the charge makes your energy guns (pulse, twin laser, forge laser, conductor, Zapshot) hit harder. Once full, each round it soaks adds half a second to the run, up to half its duration again, and the cooldown waits that much longer. An orange arc ahead of your nose shows the charge. Every hull but the dart, rapier and glaive. | MAX DAMAGE 15% → 25%, RANGE 20 → 50, DURATION 15s → 25s, COOLDOWN 20s → 12s (from the end of the run) |
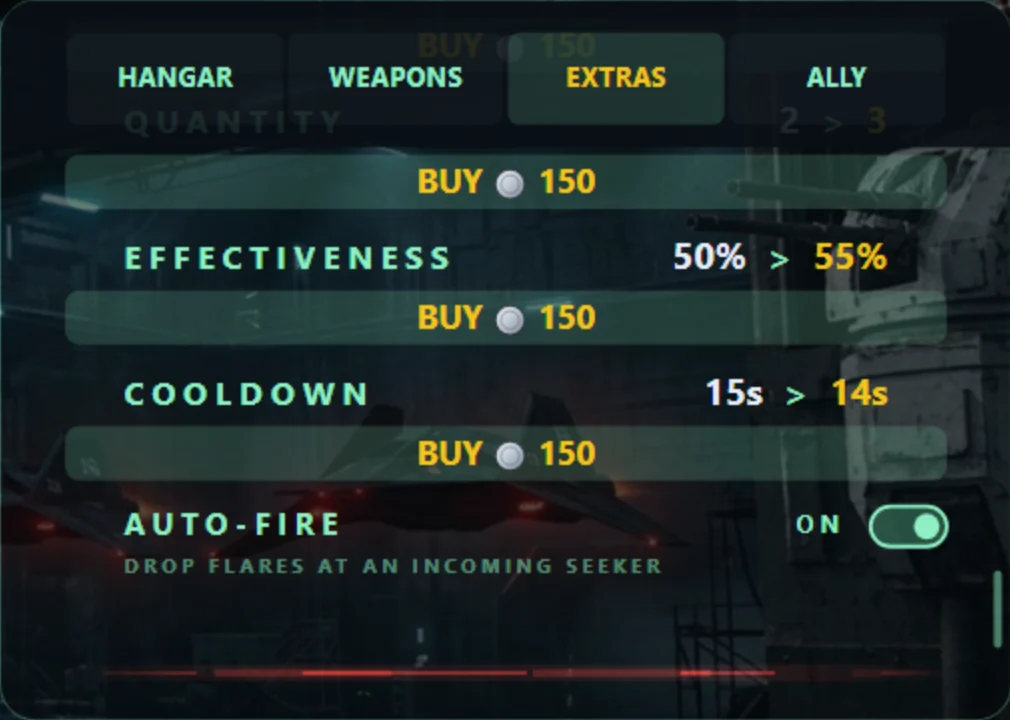
Once you own flares, an AUTO-FIRE switch sits under their dials ("DROP FLARES AT AN INCOMING SEEKER"), on by default. The launcher then drops a flare by itself just before a seeker arrives, timed to the flare's life. It's the only thing in the game that fires without you.
06 Shop: ally
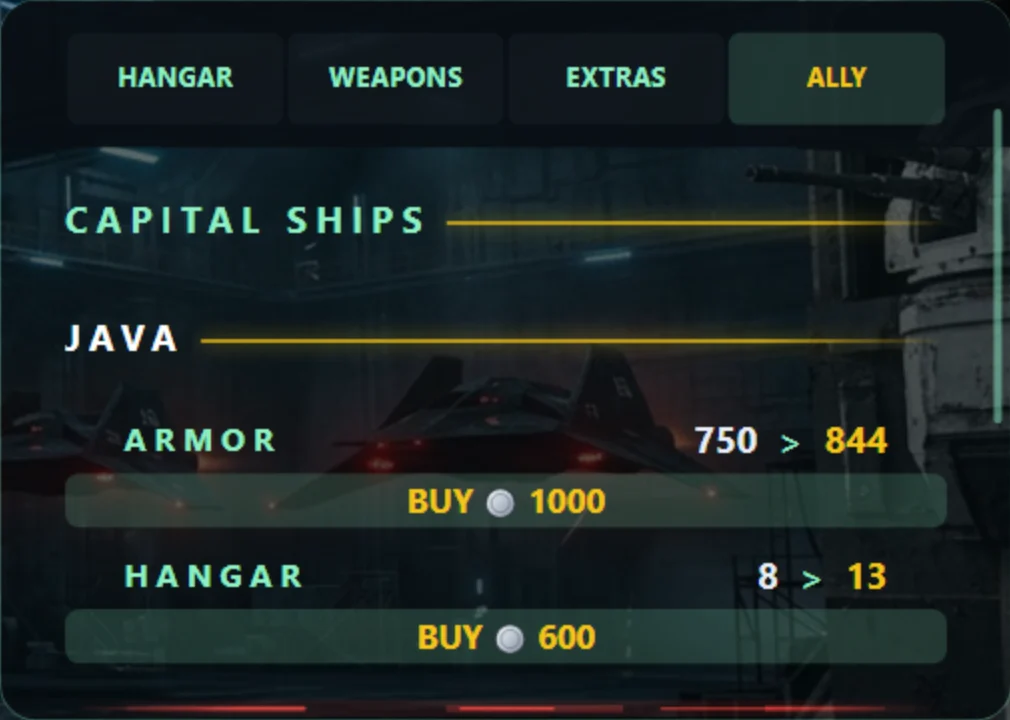
Upgrades for your allied capital ships. The page stays locked until mission 36 is won, the mission the Java first arrives on: the rows are faint, refuse presses, and say "REFIT AVAILABLE ONCE MISSION 36 IS WON".
| Row | What it buys |
|---|---|
 JAVA: ARMOR | The Java's hull, up to double, in eight steps from 1,000 credits. |
| JAVA: HANGAR | How many escorts it carries, 8 up to 45, in eight steps from 600. |
 SHREDDER XL TURRET1,500 | A double-barreled minigun turret on the Java that fires on its own. Its one dial, RATE OF FIRE, goes to double. |
 ZENA: GUNSHIP8,000 | A gunship of your own that you call in during a mission from the ally command disc. |
These improve your allies, never you, and the Java's refit doesn't carry over to the Zena.
07 Loadout
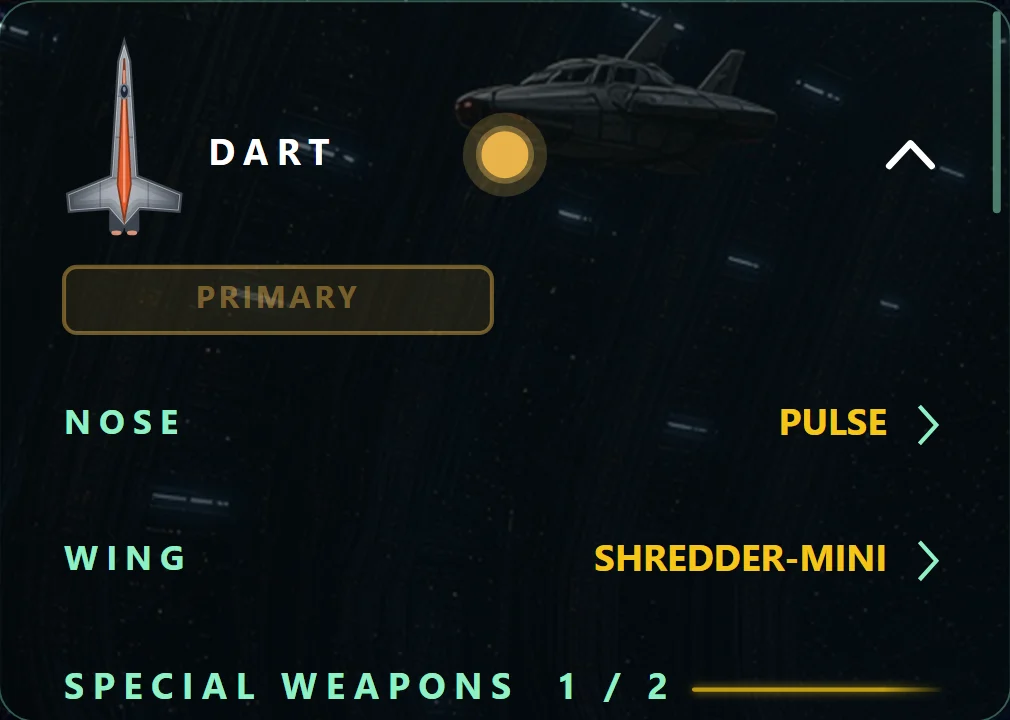
Every ship you own, primary first. Each is a section that starts folded: tap anywhere on its row to open it. Several can be open at once. Changes save straight away.
- PRIMARY and SECONDARYPRIMARY (gold) makes this the ship you fly. SECONDARY (green) adds it to your loadout, up to three besides the primary, so you can pick between them at launch and when you respawn.
- MountsNOSE, then WING (or WING 1 and WING 2). Tap a mount to open a list: EMPTY, then every gun you own. A choice that isn't allowed is greyed out: the same gun can't go on two mounts of one ship, a twin-stream gun can't go on the nose, a ship can't carry both the Basilisk and the Mamba, nor the conductor beside a Viper, the conductor only goes on a wing, and each hull has a limit on light and heavy guns: two light on every ship, one heavy below the Cutlass and two from it up. So even a cheap hull can pair two light guns, such as the Shredder-Mini and the Viper, or put the Pulse beside a twin laser. Set every mount to EMPTY and the ship flies with no gun at all: the page warns NO PRIMARY WEAPON - THIS SHIP CAN'T SHOOT. A ship like that can only fly missions you've already won, as an Ace Mode replay; PLAY on a new mission says FIT A PRIMARY WEAPON ON THE LOADOUTS TO FLY A NEW MISSION.
-
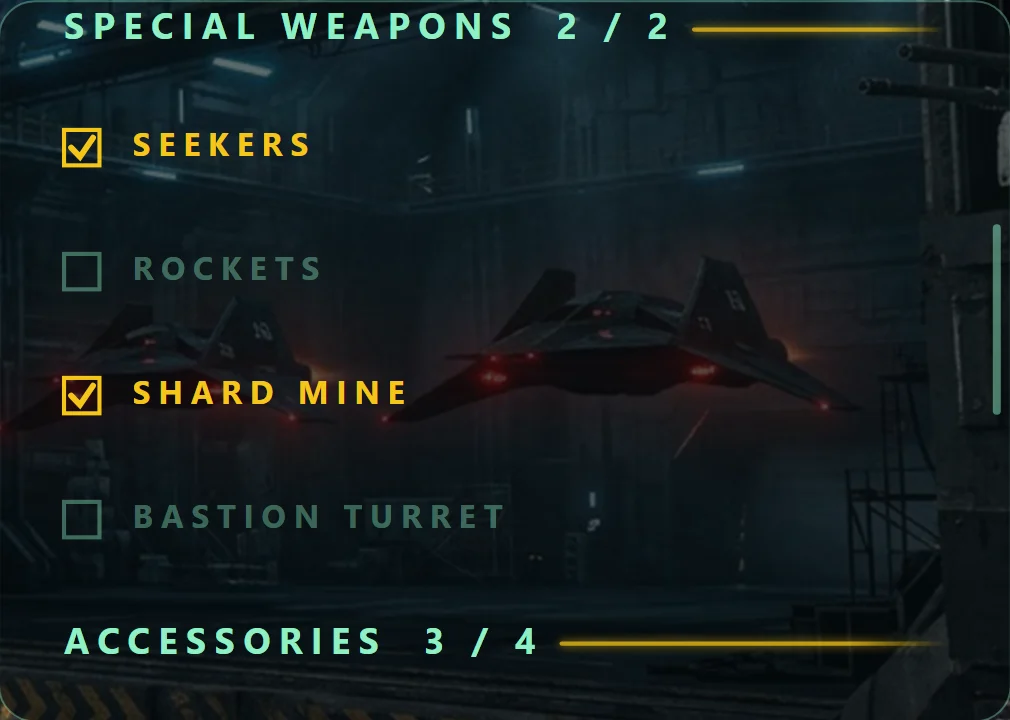
SPECIAL WEAPONSA checklist of the special weapons you own that this hull can take, with
carried / allowance. Tick to carry, untick to drop. When it's full the rest grey out until you untick one. -
ACCESSORIESThe same for accessories, with
aboard / most: three on most hulls, four on a hull that takes both the cloak and the Amplifier (bar the scout). When it's full the rest grey out. Accessories never count against the allowance.
The sentry and bastion turrets are one family, and so are the proxy and shard mines. Carrying both of a family counts as one special weapon and gives one HUD button that switches between them.
08 Settings
Switches act when you lift your finger. Sliders change as you drag and save when you let go.
AUDIO
| Setting | Default | What it changes |
|---|---|---|
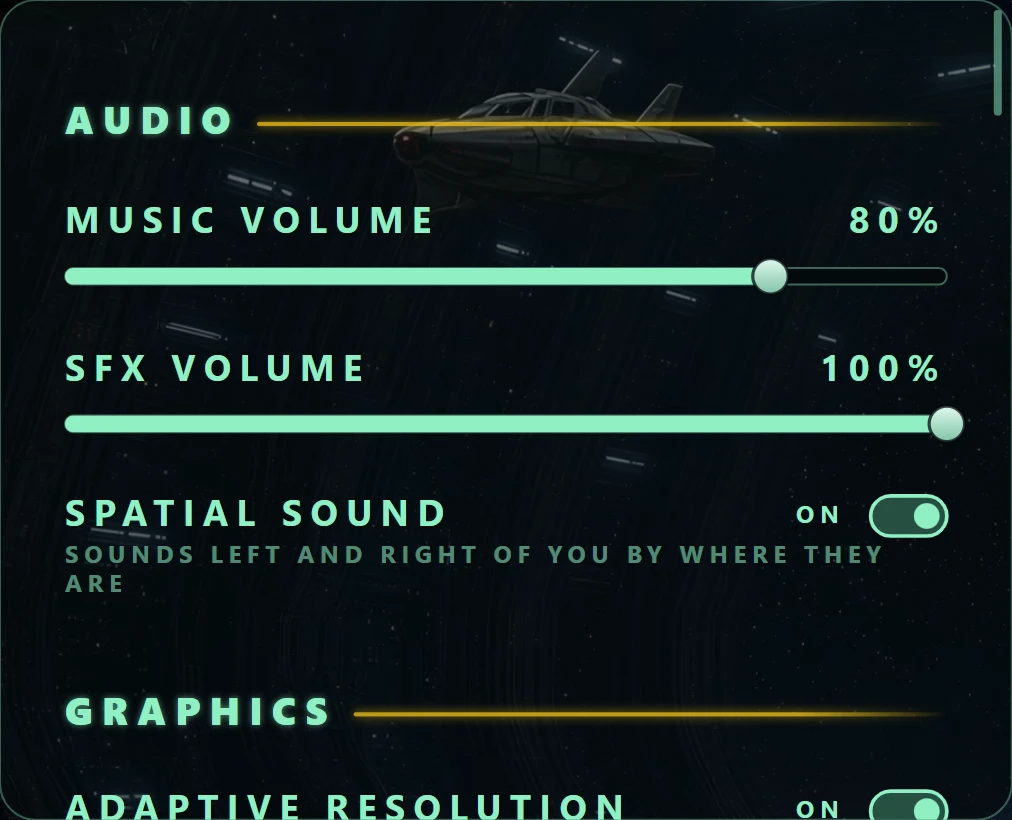
| MUSIC VOLUME | 80% | The soundtrack. The level shows beside the slider as a percentage; all the way left reads OFF and turns the music off. |
| SFX VOLUME | 100% | Sound effects. The level shows beside the slider; all the way left reads OFF and turns them off. |
| SPATIAL SOUND | On | Places sounds left and right of you by where they are on screen, so a blast off to your left is heard on the left. Long sounds, like a capital ship groaning or a rig coming apart, move across as you fly past them. Your own ship, the radio and alarms stay centred. Off plays everything centred. Replays play sounds where they were recorded. |
GRAPHICS
| Setting | Default | What it changes |
|---|---|---|
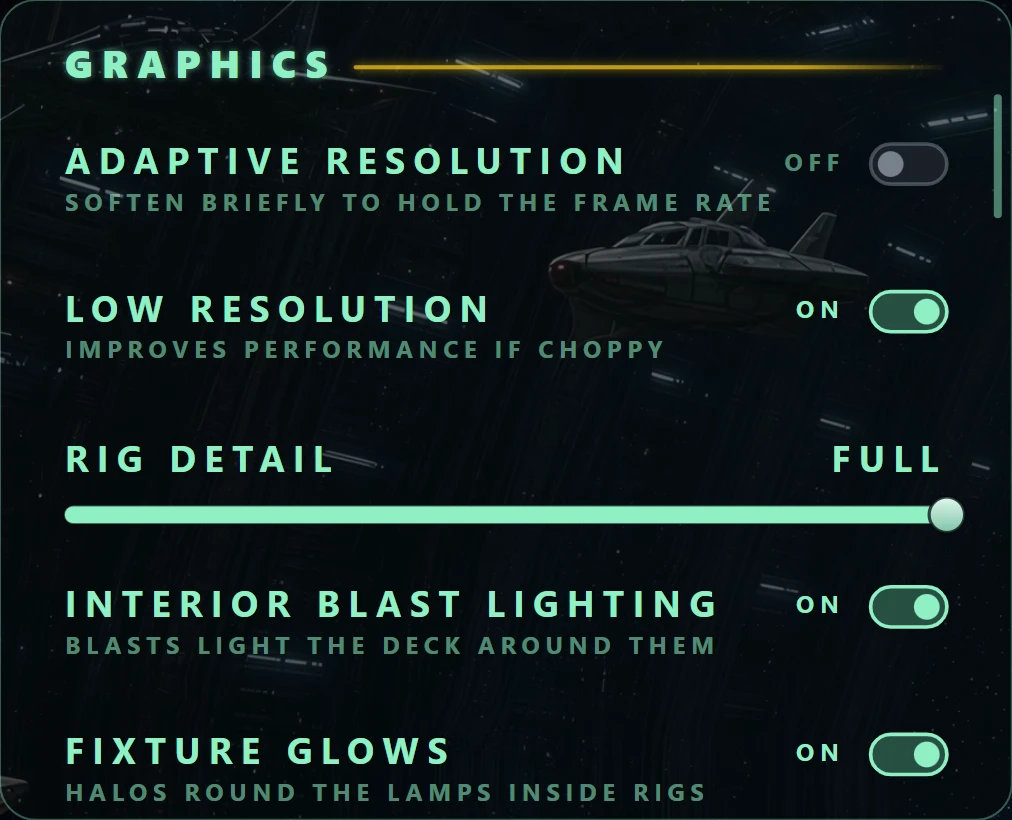
| ADAPTIVE RESOLUTION | On | Lowers the resolution when the game starts dropping below 50 frames a second in a mission, then tries full resolution again after a while. If it's still slow, it drops back and waits longer before the next try. It works only during missions, never on the cover or in the menus. A drop that doesn't make the game faster is undone, since fewer pixels don't help every machine. If dropping keeps helping over three missions, the game switches that device to LOW RESOLUTION once and tells you; what you set after that stands. Off keeps full resolution all the time, unless LOW RESOLUTION is on. |
| LOW RESOLUTION | Off | For a machine that's choppy in missions: holds every mission at three quarters resolution the whole time, rather than letting it change as the action does. Missions look a little softer and run more smoothly; the cover and the menus stay sharp. It only works with ADAPTIVE RESOLUTION off, and shows greyed out while that's on. A new player on a low-end Chromebook starts with it on. |
| RIG DETAIL | FULL | How much of the Corp's hardware the rigs carry: NONE, INTERIOR (data halls in the corridor walls), EXTERIOR (the heat plant on the hull) or FULL. Looks only; turning it down can help an older device. |
| INTERIOR BLAST LIGHTING | On | Explosions inside a rig or lode light the deck around them. Looks only. |
| FIXTURE GLOWS | On | The soft halos round the lamps inside rigs: on wall guns, repair pads, rescue halls and the corridor lights. The lamps themselves stay lit either way. Looks only; off can help an older device. |
GAMEPLAY
| Setting | Default | What it changes |
|---|---|---|
| DIFFICULTY | ROOKIE | ROOKIE, PILOT or ELITE. ELITE is the full game; everything the easier two change is in the table below. A save keeps the level it already has: one from before the setting existed stays on ELITE. Challenges are always flown at ELITE. |
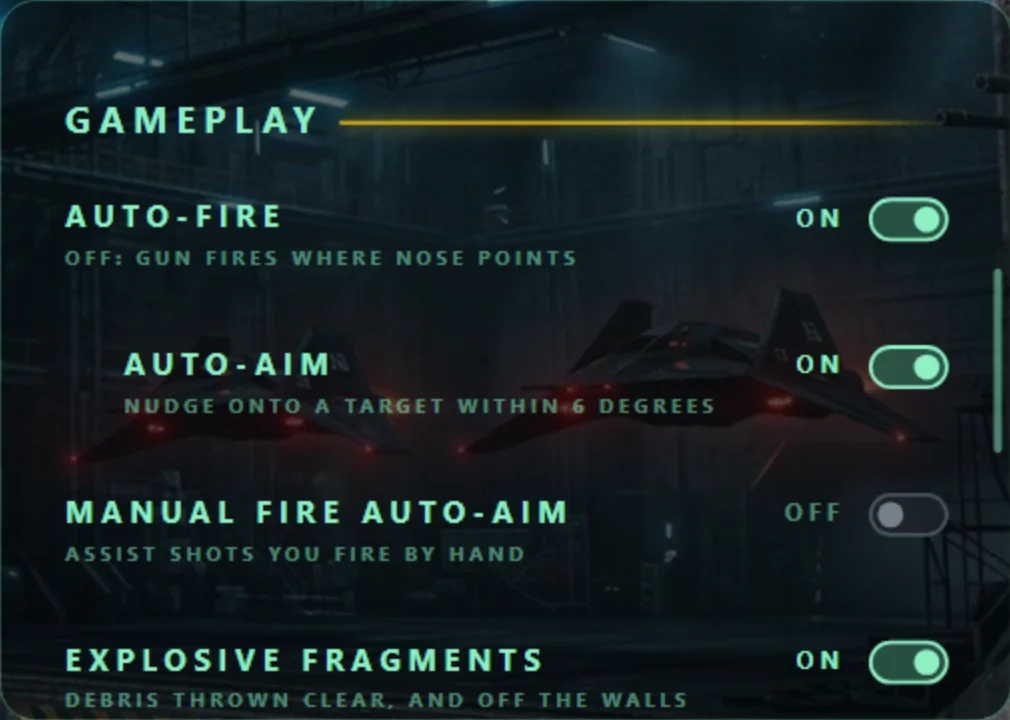
| AUTO-FIRE | On | Your gun locks onto and fires at Corp targets within 20° of the nose that it has a clear line to. From open space that means nothing behind a rig, a lode, a satellite or the dock. Off, it only fires when you fire it yourself, straight down the nose. It never shoots rock or walls by itself either way. |
| AUTO-AIM | On | With AUTO-FIRE on, the gun corrects and leads its aim onto a target within 6° of the nose, and shows a thin red sight line to it. Firing by hand overrides it. |
| MANUAL FIRE AUTO-AIM | Off | The same correction for shots you fire yourself. |
| EXPLOSIVE FRAGMENTS | On | Explosions throw debris that bounces off the walls. Looks only, and harmless. |
| CORRIDOR LINE OF SIGHT | Off | Inside a rig, Corp ships you can't see round a corner are hidden; a ship shows as soon as any of its width is in view. Your own side's ships, and the guns on a rig you've taken, are never hidden. Wall guns stay shown once you've seen them. Changes what you see, not what's there. |
| What | ROOKIE | PILOT | ELITE |
|---|---|---|---|
| Corp ships a mission opens with, from mission 12 | 60% | 75% | All |
| Guns inside the rigs, from mission 12 | 70% | 80% | All |
| Damage from Corp weapons fire | 60% | 80% | Full |
| Damage from Corp explosions | 80% | 90% | Full |
| Damage from collisions | 60% | 75% | Full |
| Damage from magma | 60% | 75% | Full |
| Wall-gun shells thrown wide of the barrel | 3° either side, through mission 30 | 3° either side, through mission 30 | 2° either side, through mission 17 |
| Ore hints | After about 10 cells, every 6 to 18 seconds | After about 20 cells, every 10 to 30 seconds | As PILOT |
| Ore contracts before mission 24 | 60% of the crystals, at least one | Full | Full |
| Chance a Corp ship you destroy leaves a heart | 12% with no extra life, 6% with one, 2% with two or more | 12% with no extra life, 6% with one, 2% with two or more | 12% with no extra life, 6% with one, 2% with two or more |
| That chance with no extra life | After 5 minutes, about +25% a minute, certain by about 15 | After 5 minutes, about +25% a minute, certain by about 15 | After 5 minutes, about +25% a minute, certain by about 15 |
| Hearts a mission can drop | 2, and 4 from mission 16 | 2 | 2 |
The ships and guns are cut evenly, not at random, so the mission is the same place with fewer guns in it. The guns near a rig's openings are kept, and the rest thin out toward the deep corridors. Capital ships and what their hangars launch, guns on the outside of a hull and the other hazards are the same at every level.
RADIO
Leo and Nikki talk to you over the Coalition's radio. See the radio in the Field Manual.
| Setting | Default | What it changes |
|---|---|---|
| SUBTITLES | On | The radio card: who is talking and their words, written out. Off hides the card and the voice still plays. The card always shows on the closing scene after mission 60. |
| MISSION BRIEFINGS | On | A short radio briefing before the mission that brings in each new kind of objective. It plays every time you launch that mission until you've won it. Off skips them. |
| RADIO VOICE | On | Leo's and Nikki's lines during a mission. Off silences them, but a capital ship calling for help or under attack, and the Coalition warning you off its ships, are still said. Toasts still show. |
CONTROLS
| Setting | Default | What it changes |
|---|---|---|
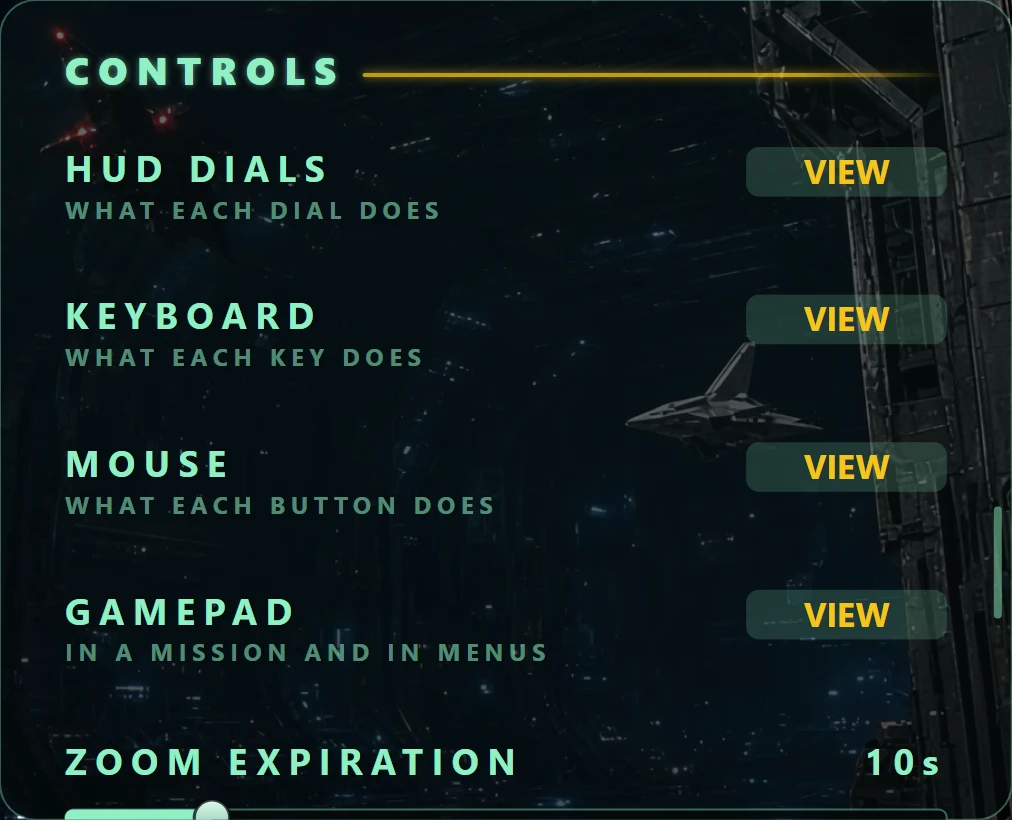
| HUD DIALS | VIEW | Nothing: opens a full-screen diagram of what each dial on the mission screen does (powerups, arsenal, special weapons, accessories and ally orders) and what your secondary fire or weapon buttons fire. It opens on your own device, with a tab for each device you could play on: TOUCH SCREEN on a phone or tablet, MOUSE & KEYBOARD and GAMEPAD on a computer, and GAMEPAD on a phone once a pad has been used. See the diagram below. |
| KEYBOARD, MOUSE, GAMEPAD | VIEW | Nothing: each opens a full-screen picture of what every key, button and stick does. A phone shows none of the three, or only GAMEPAD once a pad has been used on it. The gamepad one has a tab for missions and a tab for menus. Tap a tab to change the picture; tap anywhere else, or press Escape or B, to close it. They're the same pictures as on this page: keyboard, mouse and gamepad. |
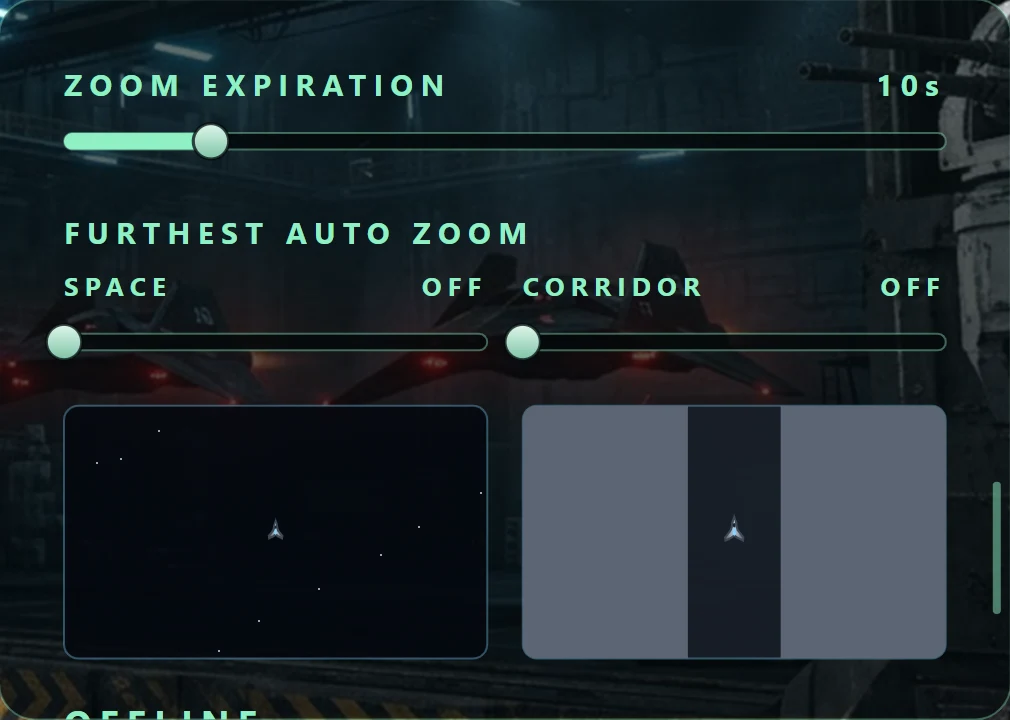
| ZOOM EXPIRATION | 10s | How long a manual zoom holds after you last touch the zoom groove, the zoom keys or the mouse wheel before the automatic camera takes over again: NEVER, or 5 to 60 seconds in fives. |
| FURTHEST AUTO ZOOM: SPACE | 1.50x | How far out the automatic camera may settle in open space, as a magnification: OFF, then 1.25x to 4.00x in quarters. Higher keeps things bigger on screen. |
| FURTHEST AUTO ZOOM: CORRIDOR | 1.0x | The same inside a rig or a lode: OFF, then 1.0x to 1.85x in twentieths. At OFF a fight in a corridor can pull the camera well out; at 1.0x it stays at the corridor's ordinary framing. |
| RESTRICT ALWAYS | Off | Holds the camera to the two levels above even when a threat is out of view, so it never pulls out further. Dimmed while both levels are OFF. |
Under the two FURTHEST AUTO ZOOM sliders, two windows draw your scout at the real size it will fly at with the setting where the knob is, one in open space and one in a corridor. With either set, a Corp ship shooting at you from outside the frame still pulls the camera out for 3 seconds, then it comes back, unless RESTRICT ALWAYS is on. The same ship can't do it again until it has been off screen for 20 seconds. The zoom groove isn't limited by it.
On a computer the right mouse button, and on a gamepad LT, is the secondary fire. It follows one rule, with nothing to set:
- It fires your chosen special weapon, the one with the yellow underline. Choose one by double clicking its button, or with 3 or the D-pad up. Until you choose, it fires the special you last fired, or the first one you carry. It only chooses ordnance, never an accessory such as flares, the cloak or the tracker.
- Hold it to charge the charge lance and let go to fire.
- If the special you chose is still cooling down, it fires nothing, so it never spends an arsenal item by accident.
- Only when your ship carries no special weapon at all does it throw the selected arsenal item instead, and then pressing it again sets off a nuke in flight.
- It never uses a powerup. Those have their own disc.
On a touch screen there's no secondary gesture. Three weapon buttons in the left half fire the arsenal item, the special weapon and the accessory instead, and you can move and resize them under TOUCH.
TOUCH
This section appears on touch screens.
| Setting | Default | What it changes |
|---|---|---|
| AIM DEAD ZONE | 50% | How far your right thumb has to move from where it landed before the nose answers, from 20% to 60%. |
| RELATIVE AIM | Off | Turns the ship as far as your thumb turns, instead of pointing the nose where your thumb is. Off, the aim starts at the nose just past the dead zone and swings toward your thumb as you push further. |
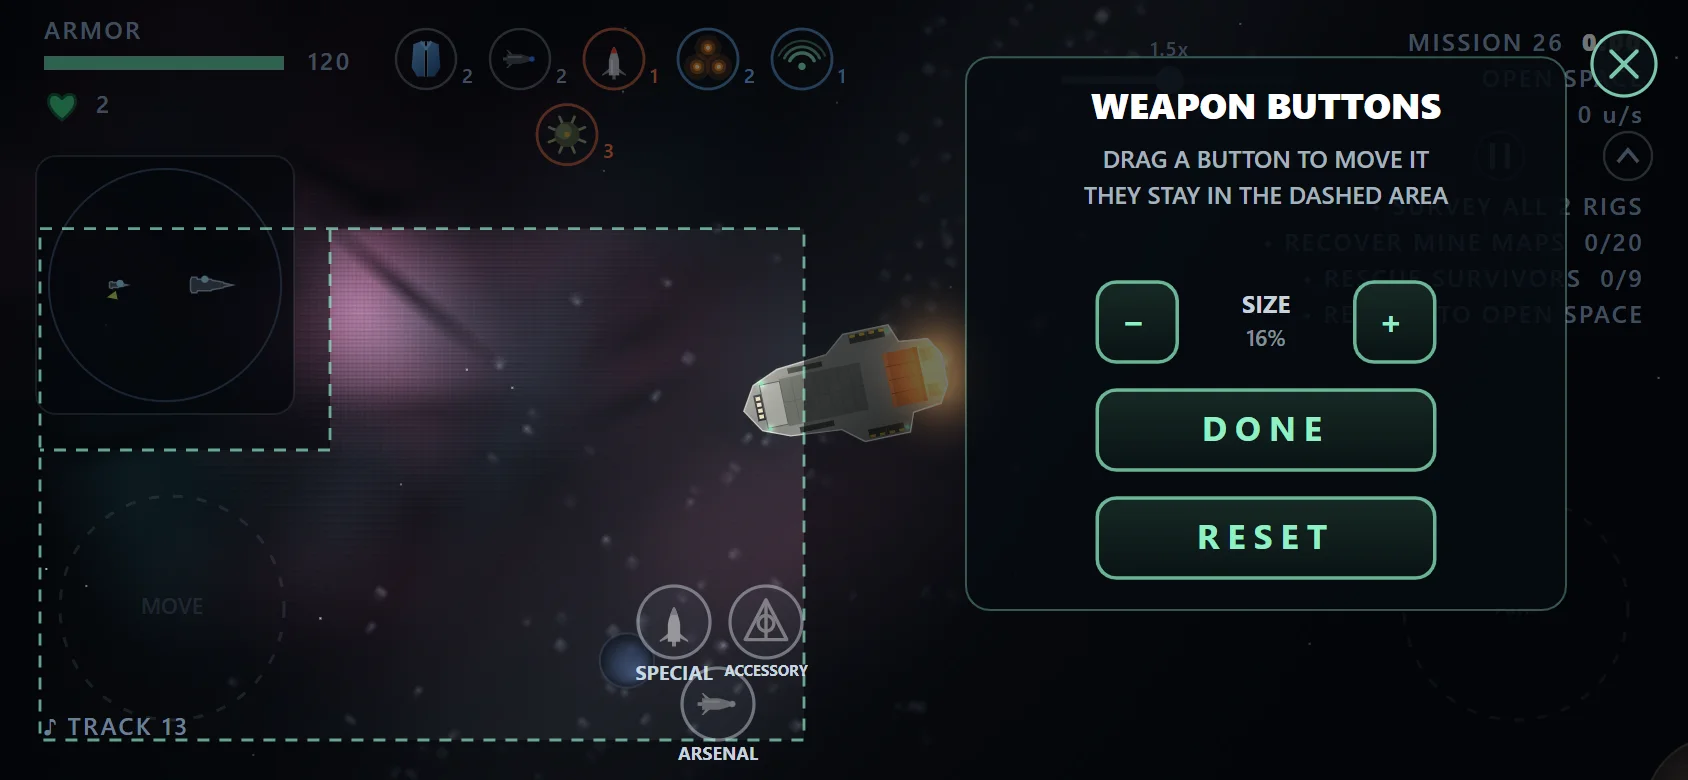
| WEAPON BUTTONS | EDIT | Opens an editor over a sample of a mission, with the HUD, dials and chart drawn as you'd see them in flight. Drag the arsenal, special weapon and accessory buttons anywhere in the left half below the dials, beside or below the chart; they won't go onto each other or the chart. The minus and plus resize all three together. DONE saves, RESET puts back the default (tucked into the bottom right of the left half), and the X closes without saving. The layout keeps its distance from the screen's corner, so it carries over to another phone. See the weapon buttons. |
GAMEPAD
This section appears once you have used a gamepad. Only controllers the browser reads with the standard layout count, so a phone's fingerprint sensor or other odd device can't spend items.
| Setting | Default | What it changes |
|---|---|---|
| STICK DEAD ZONE | 15% | How far a stick has to move before it counts, from 5% to 35%. Raise it if the ship drifts with the sticks at rest. |
| STICK SENSITIVITY | 1.00x | How strongly the sticks answer, from 0.50x to 2.00x. |
COMMUNICATIONS
Shown while you're signed in. It belongs to your account, so it's the same on every device.
| Setting | Default | What it changes |
|---|---|---|
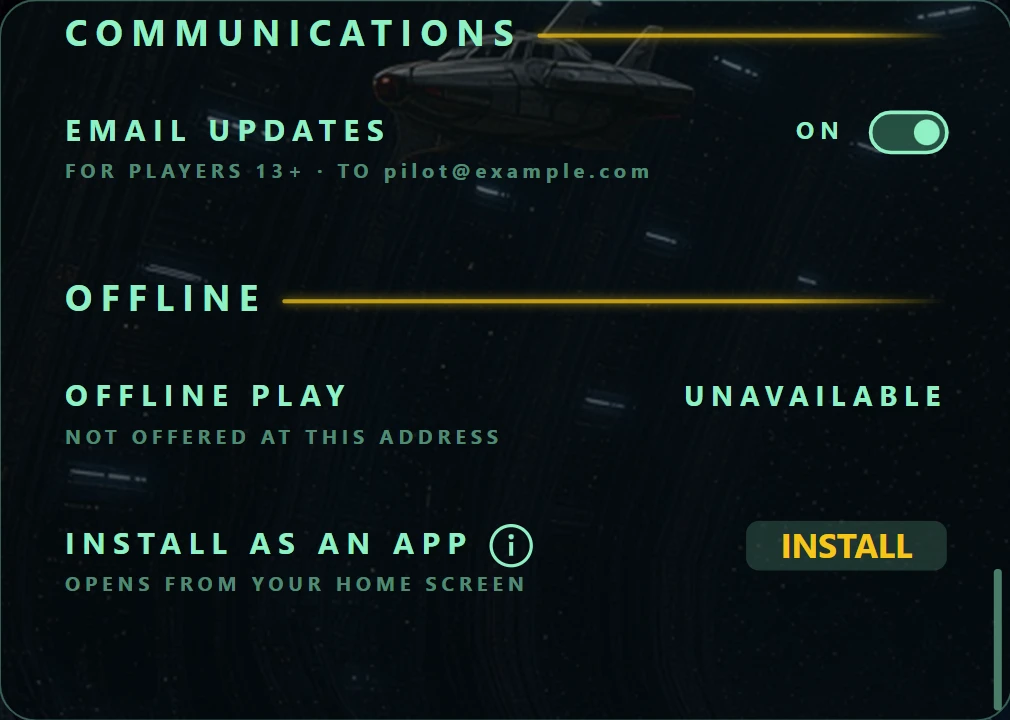
| EMAIL UPDATES | Off | Game highlights and update announcements from shiftnship.ai, sent to the address shown under it. For players 13 and over. Off until you turn it on here or tick the box when you sign in, and every email has a link to stop them. See the privacy notice. |
OFFLINE
For playing with no connection, on a plane say. The soundtrack fills in over your first few visits, so check this before you lose signal.
| Row | What it says |
|---|---|
| OFFLINE PLAY | READY once the whole game, music included, is stored on this device. MUSIC n/26 while the tracks are still coming in: stay online until it reads READY. |
| INSTALL AS AN APP | An INSTALL button where your browser offers one. On an iPhone or iPad, the steps instead: in Safari, Share, then Add to Home Screen. The i beside it explains what installing does: the game opens from your home screen, plays with no connection, keeps your progress on the device, and if you're signed in, saves it to your account the next time you're online. |
09 The mission deck
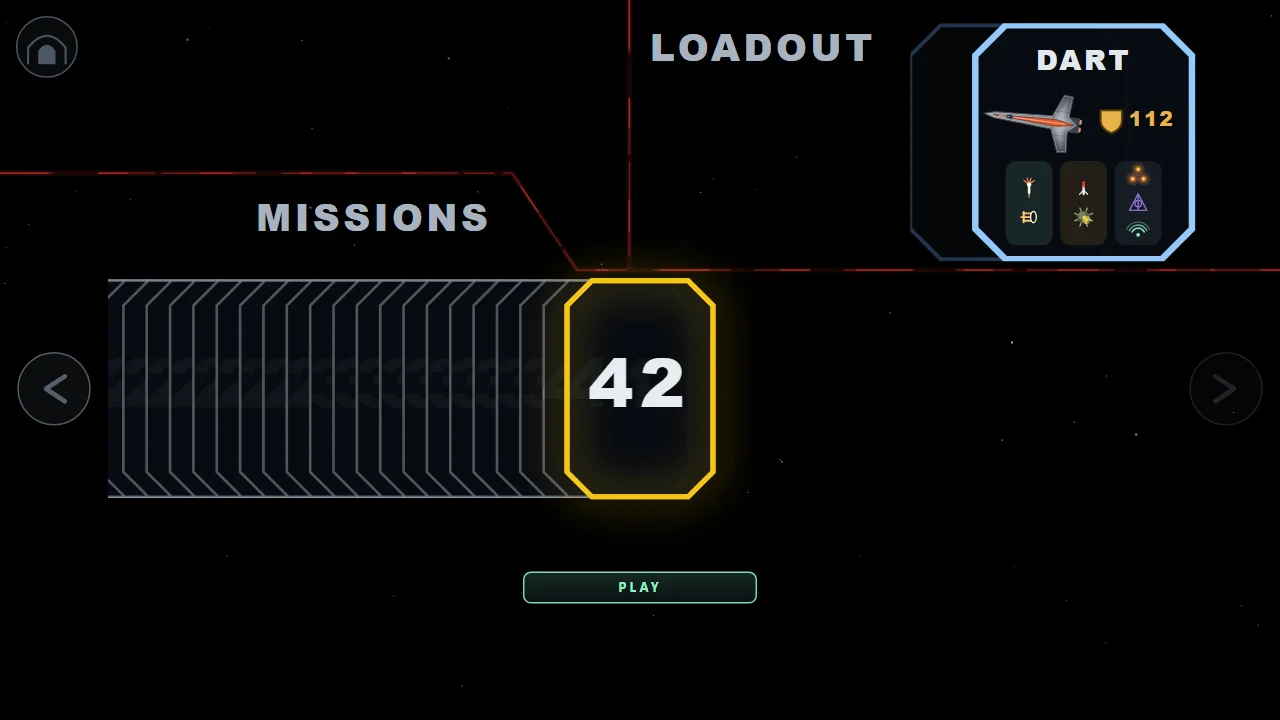
PLAY deals a card for every mission you've reached, onto a field of stars. The card in the middle, glowing yellow, is the one you'll fly. The next mission you haven't won is a gold card. A mission you've won is silver, or green when winning it again counts toward an open goal, and it wears marks for what it asked of you: the survey, maps, blueprints, survivors, a civilian, each ore in its contract, the ASI artifact, a rig to take or to demolish, and the capital ships it opened with, with red brackets round one you had to destroy.
| Control | What it does |
|---|---|
| Drag or flick | Moves the deck under your finger; a flick throws it and it settles on a card. Drag right for earlier missions. |
| Tap a card | Brings it to the middle. |
| Arrows | Step one card at a time. Several quick taps step several cards. |
| Tap during the deal | Hurries the deal to finish within a second. |
| PLAY | Flies the chosen mission, once the deal has finished. |
| REC (beside PLAY) | Records the mission you're about to fly. It's off every time the deck comes up, so you choose it for each mission. See Recording a mission. |
| Green cards | Winning a green card again counts toward an open goal. A dimmer green means only ore and survivor goals count it. The key, a small green card marked COUNTS FOR GOALS, sits beside MISSIONS. |
| Marks on a won card | What that mission asked for: a grid under the number on the chosen card, and a column down the visible edge of the others. |
| LOADOUT stack (top right) | Your primary and secondary ships, each showing its armor and what it carries. Swipe or tap to choose which flies this time. It isn't saved: next time it opens on your primary. |
| Hangar mark (top left) | Straight back to the cover, even mid-deal. |
A won card is a replay: it banks nothing but flight time, and anything you use on it is given back. One exception: the first time you win a replay with no primary gun, from mission 3 on, it pays a 125-credit ACE MODE bonus. See Retries & replays.
Recording a mission
Turn on REC before PLAY and the mission is recorded as a demo, kept in this browser. It
stops when the mission ends, when you walk out to the hangar, or after an hour. The last five are kept:
a sixth pushes out the oldest. Back on the cover, a card above PLAY offers the one you just flew, and
they're all on the REPLAYS tab. Save one as a .snsdemo file to keep it
for good or send it to someone. A recording carries its own rigs, so it plays the same on later versions
of the game. Watching one works as it does for a Challenge
demo, and the pilot line names the difficulty: PILOT R: for ROOKIE,
PILOT E: for ELITE, and plain PILOT: for PILOT.
10 Death & endings
| What happened | On screen | The button |
|---|---|---|
| Ship lost, lives left | SHIP DESTROYED | RESPAWN, under a count from 10 down to 1: a new ship where you were lost, with three seconds of protection while it blinks. Only pressing it spends a life; when the count runs out it becomes CONTINUE, which leaves the mission as walking out does. A small loadout stack under the button lets you come back in a different ship, of the same kind: one with a primary gun on a normal run, one without on an Ace Mode replay. |
| Last ship lost | SHIP DESTROYED | CONTINUE: back to the cover. |
| Mission failed | MISSION FAILED | CONTINUE. See when a mission fails. |
| Mission won | MISSION COMPLETE | CONTINUE: the payout wheel on a first win, otherwise the cover. The first time you win a replay with no primary gun, from mission 3 on, it pays a 125-credit ACE MODE bonus. |
The button appears after about a second. Time slows while your wreck burns, and all your controls stop.
11 The payout wheel
Win a mission for the first time and an octagon of eight lit sections comes up. Where the light lands is decided before you touch anything; tapping improves what's on the board, never where it stops.
- TAP FASTTwo seconds of tapping. Each tap reveals a section's prizes and every fourth tap raises the weakest section's credits by 25. Your mission earns bonus prizes (an item and an extra life in turn): the better you flew, the more of them land on the board by themselves, and fast taps spread all round the ring add the rest. With a keyboard or gamepad, aim at a side of the ring with W A S D (two together for a diagonal), the stick or the D-pad, and tap with Space, Enter, A or RT.
- The spinThe light runs round, slows and stops.
- FireworksSmall blasts for the credits you won and a big one for each other prize.
- The cardsWhat you won, as cards: silver for credits, gold for extra lives, navy for a weapon upgrade, magenta for an item. Anything charged comes last on a plain card: CIVILIAN LOST, or the Zena's call. Tap to put them away.
- Carry onPLAY MISSION N flies the next mission; the hangar mark returns to the cover.
Everything is banked the moment the light stops. The odds and the bonus budget are in the Field Manual's payout wheel section.